Article Number: 000221260
Alienware Pro Wireless Gaming Mouse Usage and Troubleshooting Guide
Summary: The following article provides information about the Alienware Pro Wireless Gaming Mouse. You can reference each section to learn more about the features of the Alienware Pro Wireless Gaming Mouse and how to use it. ...
Article Content
Instructions
Table of Contents:
- What is in the Alienware Pro Wireless Gaming Mouse box
- Alienware Pro Wireless Gaming Mouse Features
- Setting up your Alienware Pro Wireless Gaming Mouse
- Troubleshooting
- Additional Information
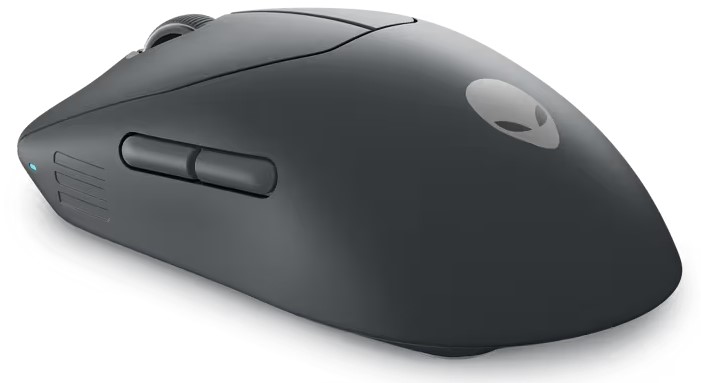
Figure 1: Alienware Pro Wireless Gaming Mouse in the Dark Side of the Moon Color
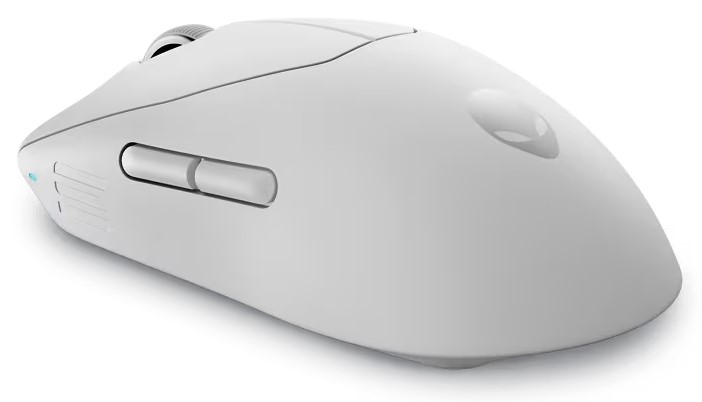
Figure 2: Alienware Pro Wireless Gaming Mouse in the Lunar Light Color
What is in the Alienware Pro Wireless Gaming Mouse box
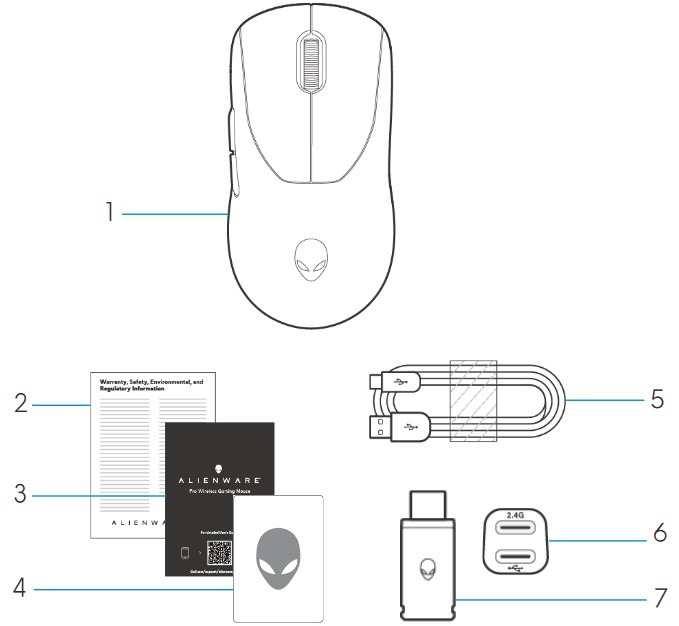
Figure 3: Alienware Pro Wireless Gaming Mouse Box Contents
| 1 | Alienware Pro Wireless Gaming Mouse | 2 | Regulatory document |
| 3 | Quick Start Guide | 4 | Alienware sticker |
| 5 | USB-A to USB-C charging cable | 6 | Extender |
| 7 | Type-C dongle |
Alienware Pro Wireless Gaming Mouse Features
Top and Bottom View
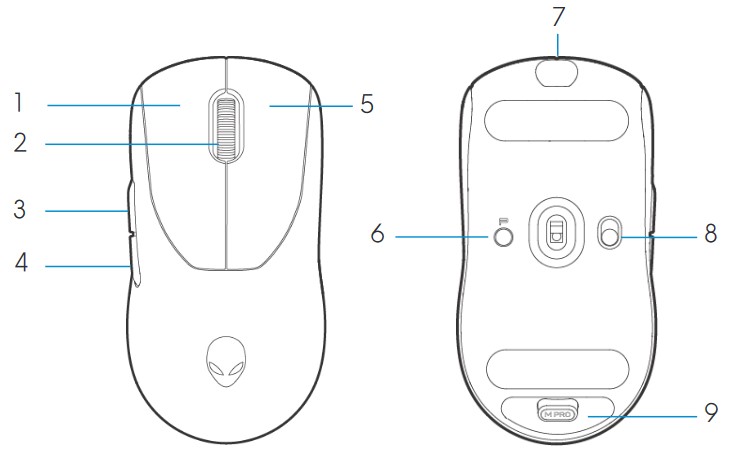
Figure 4: Alienware Pro Wireless Gaming Mouse Top and Bottom View
| 1 | Left button | 2 | Scroll wheel |
| 3 | Forward button | 4 | Backward button |
| 5 | Right button | 6 | Preset button |
| 7 | USB-C Port | 8 | Power Slider |
| 9 | Dongle Storage |
Product Features
Alienware Pro Wireless Gaming Mouse is Alienware's first professional-approved gaming mouse, designed and engineered for Esports.
Key features include:
- Gaming grade 4 KHz and 8 KHz wireless and wired polling rate
- Long lasting 120 or 32 hours of battery life at 1 KHz or 4 KHz
- Ultra lightweight < 60 g design
- Optical switches with Alienware-exclusive Magnetic-Force Keyplates
- High-performance sensor with 26,000 dots per inch (DPI), 650 inches per second (IPS), and 50 G acceleration
- PTFE feet with no additives
DPI
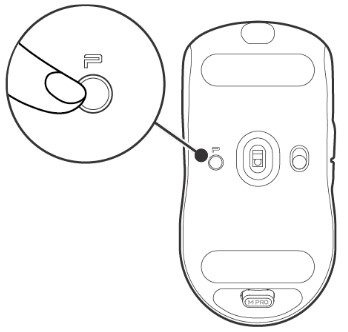
Figure 5: Alienware Pro Wireless Gaming Mouse DPI
- The Preset button switches through five adjustable DPI values.
- On the first press, the current DPI level color is displayed on the LED.
- A subsequent press of the button changes the DPI level. The DPI levels and their associated colors are indicated in the following table.
| DPI1 | White (Default 400) |
| DPI2 | Teal (Default 800) |
| DPI3 | Magenta (Default 1200) |
| DPI4 | Green (Default 1600) |
| DPI5 | Red (Default 2400) |
- The default DPI is 800. Setting DPI to zero removes the DPI level. You can change the DPI setting and customize the DPI level using Alienware Command Center (AWCC).
- The default polling rate is 1000 Hz.
- The polling rate is configurable in AWCC. The maximum polling rates of each connectivity are as follows:
- Wired mode: 8000 Hz
- Wireless mode: 4000 Hz
Setting up your Alienware Pro Wireless Gaming Mouse
Compatibility
Operating Systems:
- Windows 10 - Redstone 3 or later
Turning on your Alienware Pro Wireless Gaming Mouse
- Remove the protective sheet from the mouse.
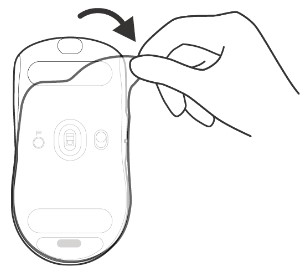
Figure 6: Removing the protective sheet from the mouse
- Slide the power slider down to turn on the mouse.
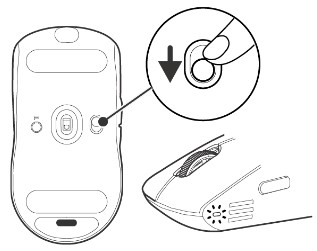
Figure 7: Sliding the power slider down on the mouse
Connecting the Alienware Pro Wireless Gaming Mouse
The Alienware Pro Wireless Gaming Mouse uses a USB Type-C connector to connect to your desktop or laptop.

Figure 8: USB Type-C Connector
Wireless Connection Mode Using the Extender
- Connect the USB Type-C side of the cable to the extender.
- Connect the USB Type-C dongle to the extender.
- Connect the USB Type-A side of the cable to your computer.

Figure 9: Wireless connection using the extender
Wired Connection Mode
Connect the USB Type-C side of the cable to your mouse. Connect the USB Type-A side of the cable to the USB port on your computer.

Figure 10: Wired connection
Installing the Alienware Command Center (AWCC)
Alienware Command Center is used to control the features and options of the Alienware Pro Wireless Gaming Mouse. Alienware Command Center can be installed through either Windows Update or the Dell Support site.
Installing Alienware Command Center through Windows Update
Connect your Alienware device to your computer using the USB port. A prompt appears informing you that AWCC installation is initiated. The AWCC application is downloaded and installed automatically. AWCC installation takes up to ten minutes to complete.
Installing Alienware Command Center from the Dell Support site
- Go to the Dell Support site.
- Type "Alienware Pro Wireless Gaming Mouse" in Identify your product or search support and then click Search.
- Select Drivers & Downloads.
- Select the Operating System.
- Download the Alienware Command Center full installer.
- If you have a non-Alienware or non-Dell computer, click the Download button of the Alienware Command Center application for a third-party computer.
- If your computer already has Alienware Command Center preinstalled and you want to reinstall the software, click the Download button of the Alienware Command Center application.
- Browse to the folder where you saved the setup files.
- Double-click the setup file and follow the on-screen instructions to install the application.
Alienware Command Center appears under All apps in the Start menu after the application is installed successfully. Launch Alienware Command Center to start the application.
Troubleshooting
| Problems | Possible solutions |
|---|---|
| The mouse is not functioning as intended. |
|
| The mouse is not running based on the configuration selected in the Alienware Command Center (AWCC) application. | Open the Alienware Command Center (AWCC) application and ensure that the selected configuration is set up and saved. |
| Resolving a cursor issue |
|
Additional Information
Learn how to use and troubleshoot problems with the Alienware Pro Wireless Gaming Mouse User's Guide you use with your computer. You can find information about Troubleshooting steps, How-To guides, and relevant Support Videos for assistance.
For the Alienware Pro Wireless Gaming Mouse User's Guide, browse to the Alienware Pro Wireless Gaming Mouse Online Manual Page. Touch or click View PDF to the right of the Alienware Pro Wireless Gaming Mouse User's Guide, located in the Manuals and Documents section.
Article Properties
Affected Product
Alienware Pro Wireless Gaming Mouse
Last Published Date
09 Feb 2024
Version
4
Article Type
How To