DCIP 4.1を使用したSCCMを搭載したインテルSkylakeシステムのイメージング
Resolution
この記事では、「Microsoft System Center Configuration Manager(SCCM)2012を搭載したインテルSkylakeシステムの、Dell Client Integration Pack(DCIP)4.1を使用したイメージング」について説明します。
SCCM 2012を搭載したSkylakeシステムのイメージング
この記事では、Dell Client Integration Packバージョン4.1を使用して、インテルSkylakeチップセットを搭載したデル製システムに、Windowsイメージを適用する方法について説明します。
イメージング手順
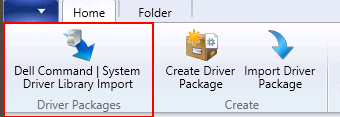
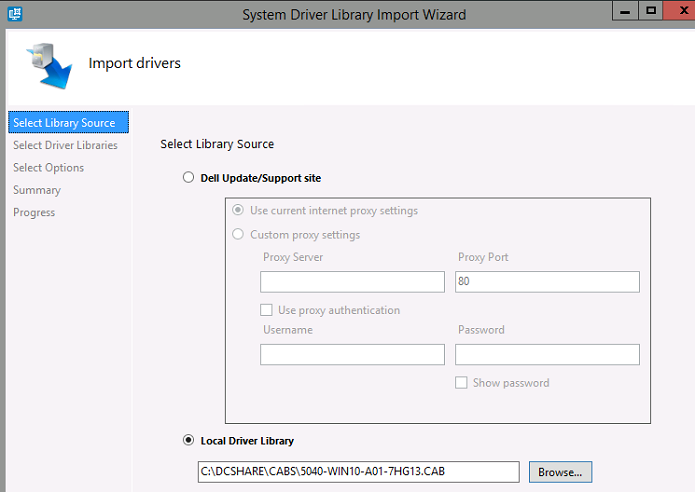
Dell Client Integration Packをダウンロードします。
- 新しいブートイメージをSCCM 2012に追加します。
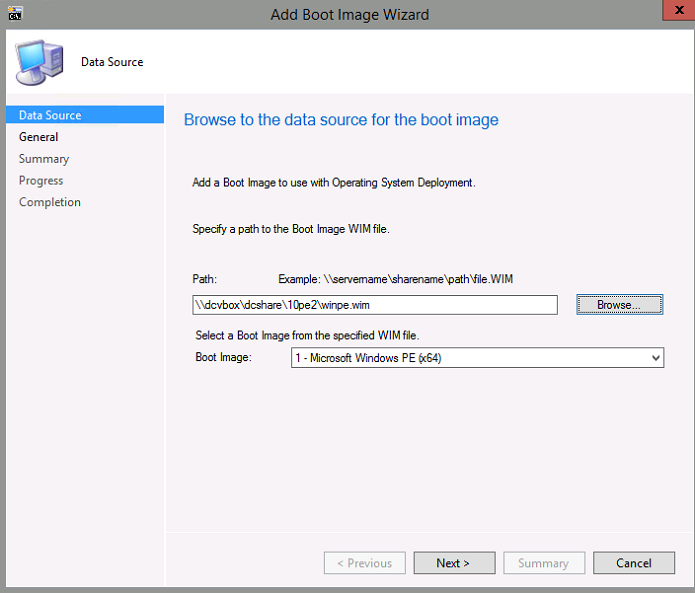
メモ: DCIPがインストールされているブートイメージの下の新しいボタン: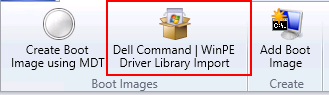
- 「DCIP WINPE Driver Import Wizard(DCIP WINPEドライバ・インポート・ウィザード)」を使用して、WinPE 10 CABファイルA01(またはそれ以降)ドライバを追加します。
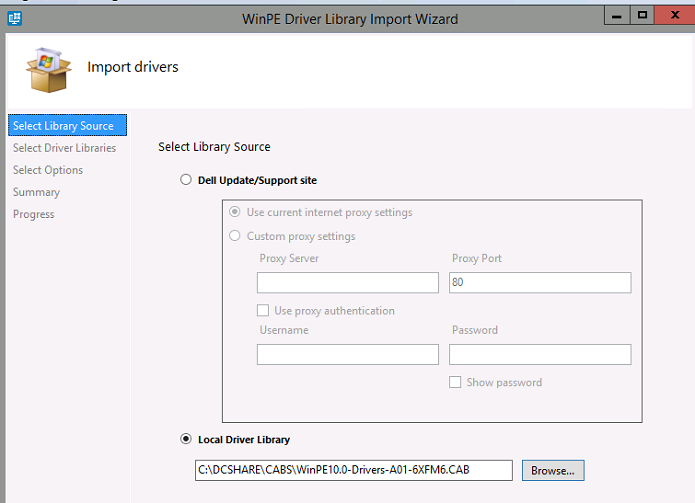
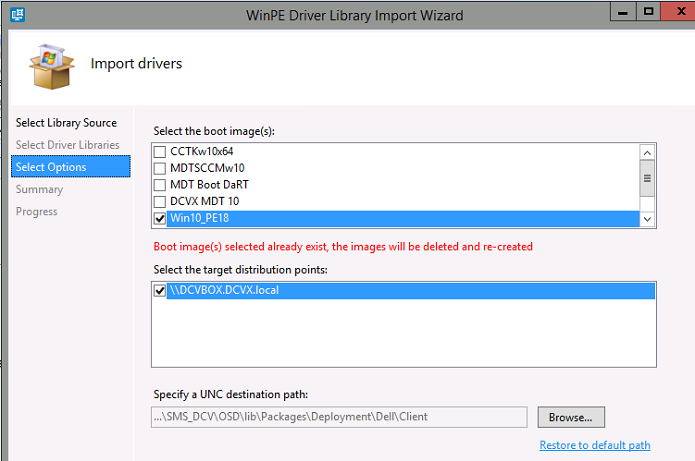
- Windows 10 PE CABを統合する新しいブートイメージを選択します。
DCIPを使用しない場合は、Windows 10 PE CABドライバを、W10PEx64-A01(またはCABファイルがインポートされた任意のバージョン)という名前のフォルダおよびカテゴリにインポートします。
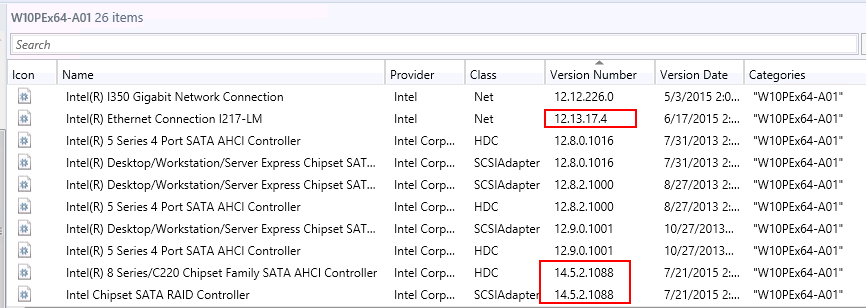
インテル・ラピッド・ストレージ・ドライバが14.5.2.x以降で、インテル・イーサネット・ドライバが12.13.x以降であることを確認します。
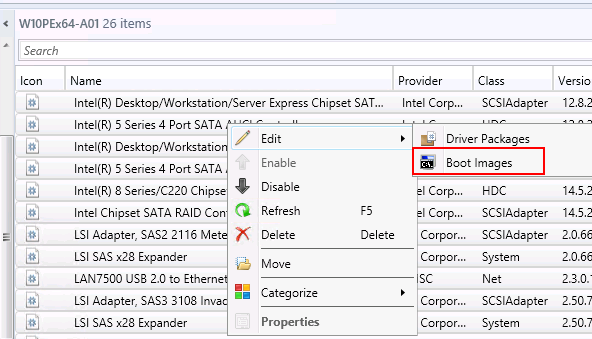
PE10x64フォルダ内のすべてのドライバを選択してから右クリックし、「Edit Boot Images(ブートイメージの編集)」を選択します。
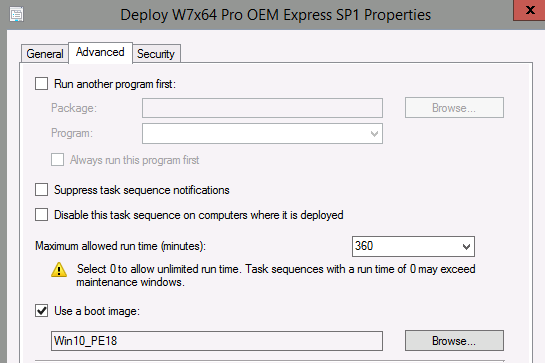
新しいブートイメージを選択します。

分布点を更新します。
- タスクシーケンスの新しいブートイメージ部分を作成します。
- ターゲットシステムの適切なCABファイルをインポートします。
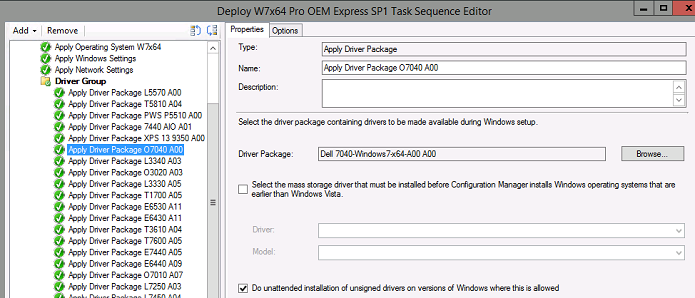
- ドライバパッケージを、「Task Sequence(タスクシーケンス)」に追加します。
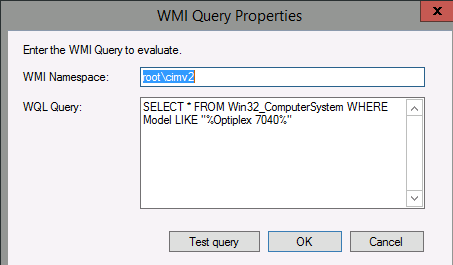
- 「Windows Management Instrumentation(WMI)コール」を使用して、適切なシステムに適切なCABファイルを送信します。
- Task Sequence(タスクシーケンス)を開始します。
必要なオプション手順: Windows 7イメージへのNVMe修正の追加:
Update to add native driver support in NVM Express in Windows 7 and Windows Server 2008 R2(Windows 7およびWindows Server 2008 R2のNVM Expressで、ネイティブ・ドライバ・サポートを更新して追加)
KB2990941をC:\dcshare\NVMEw7fixに解凍
"0x0000007E" Stop error after you install hotfix 2990941 in Windows 7 SP1 or Windows Server 2008 R2 SP1(Windows 7 SP1またはWindows Server 2008 R2 SP1で、ホットフィックス2990941をインストールした後、「0x0000007E」停止エラー)
KB3087873をc:\dcshare\NVMEw7fix2に解凍
- SCCMで「Windows 7 image(Windows 7イメージ)」に移動します。
- 「プロパティ(Properties)」に移動します。
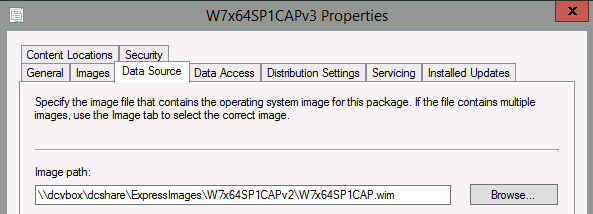
- 「Data Source(データソース)」を選択し、イメージWIMファイルの場所をメモします。
- Windows 7イメージをマウントし、NVMe修正を統合します。
- DISM /mount-wim /wimfile:c:\dcshare\ExpressImages\W7x64SP1CAPv2\W7x64SP1CAP.wim /index:1 /mountdir:c:\dcshare\temp
- DISM /image:c:\dcshare\temp /add-package /packagepath:c:\dcshare\nvmew7fix
- DISM /image:c:\dcshare\temp /add-package /packagepath:c:\dcshare\nvmew7fix2
- DISM /unmount-wim /mountdir:c:\dcshare\temp /commit
- 「Windows 7 image(Windows 7 イメージ)」の下の「Images(イメージ)」タブに移動します。
- 「Reload(再ロード)」をクリックします。
- イメージの分布点を更新します。