Dell PowerVault TL2000 / TL4000 Tape Library : How to manually release the magazine?
Summary: This article explain how to manually release the magazine from the Tape Library 2000 or 4000 when it cannot be ejected from the library using any other solution.
This article applies to
This article does not apply to
This article is not tied to any specific product.
Not all product versions are identified in this article.
Symptoms
NOTE: For more information, refer to Dell Knowledge Base article Support Articles for Dell PowerVault products.
This article explain how to manually release the magazine from the Tape Library 2000 or 4000 when it cannot be ejected from the library using any other solution.
Table of Content
- Situation - A Mechanical Problem with the Library
- Preparation - What to do First
- Solution - Manually Remove Magazine(s)
NOTE: This entire process is referenced, in the PowerVault TL User's Guide.
Situation - A Mechanical Problem with the Library
Typical Issues in this Situation
In the situation where a severe mechanical problem occurs with the library, the following might be occurring:
- A mechanical error message displayed on the front Operator Control Panel (OCP), or within the RMU (Remote Management Unit) / Web Interface.
- The magazine(s) in question may not release through OCP and/or RMU.
- If media is attempted to be moved through the RMU and/or OCP, and it does not move to the requested slot or Input / Output slot.
Preparation - What to do first
The following should be done in preparation to manually releasing the magazine(s) in question:- Stop the backup software services, if not already done.
- Power down the library through the OCP. OCP - Press the power button on the left-side of the display (LCD).
- Unplug the power cord from the library. Have a second person available to stand in the front of the library.
- This is to help manually release the magazine. Gather a large paper clip, or something similar to push through an access hole on the back of the library.
Solution - Manually Release Magazine(s)
The following is the process to manually release the magazine(s):
- Make sure the TL2000/4000 power cable is unplugged.
- Use a pointy object to lightly press into the hole and ask someone to release the magazine. (See image below)
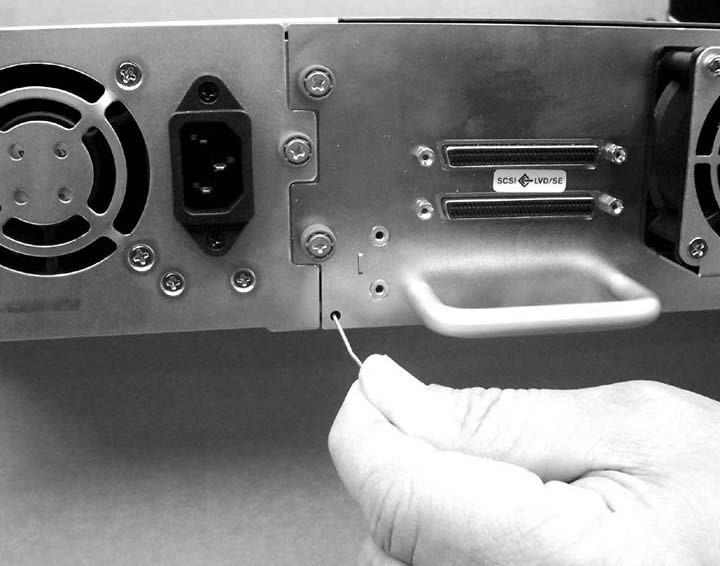
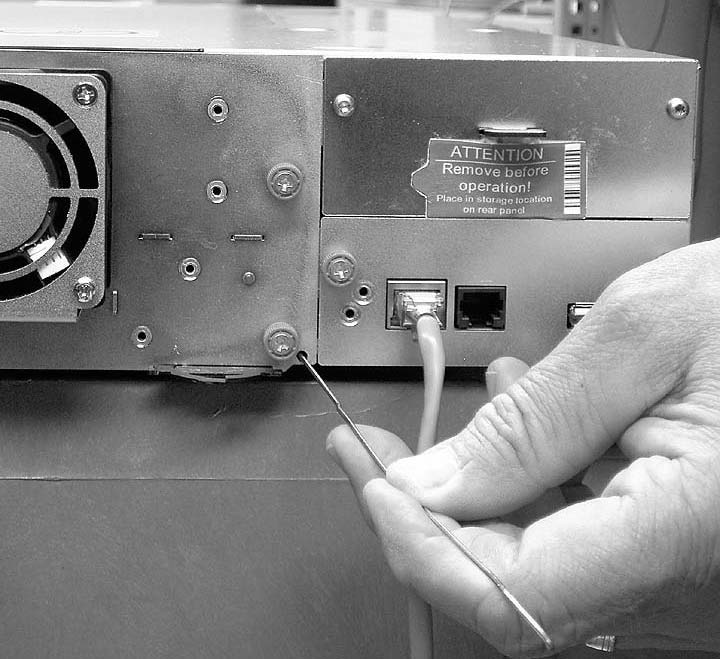
- Use the pictures below to find the access holes for the right and left magazines (Figure 1 or 2).

Figure 1: Locating the Magazine Holes (Shown: Left Access Hole)
- To manually release the magazines, push the end of a straightened paper clip into the access hole for each magazine at the back of the library (Figure 1 or 2, as appropriate).

Figure 2: Manually Releasing the Magazines (Shown: Right Access Hole)
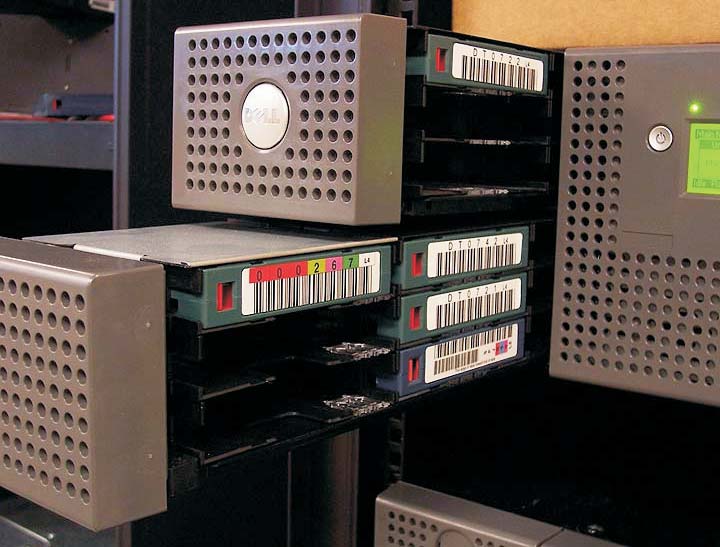
- While holding the paper clip, have a second person pull the magazine out of the front of the unit (Figure 3 or 4). DO NOT push the paper clip in more than 1/2 inch.

Figure 3: Removing the Magazine (Shown: TL2000 Left Magazine Release)

Figure 4: Removing the Magazine (TL4000 Left Magazine Release)
- If there are additional tapes still in the library, or if you were unable to manually remove the magazines and drive, contact Dell Technical Support for further instructions or assistance.
Cause
-
Resolution
-
Affected Products
PowerVault TL2000, PowerVault TL4000Article Properties
Article Number: 000126350
Article Type: Solution
Last Modified: 23 Sept 2021
Version: 7
Find answers to your questions from other Dell users
Support Services
Check if your device is covered by Support Services.