PowerEdge : How to Run Hardware Diagnostics on your Server
Summary: Hardware Diagnostics are embedded tools installed in the pre-OPERATING SYSTEM of your server to check hardware is working as designed.
Instructions
This article shows how to start the Hardware Diagnostic on PowerEdge servers, which is a tool provided by Dell for basic troubleshooting and maintenance.
Table of Contents
- Introduction
- PowerEdge Servers 12G, 13G and all newer generation servers
- PowerEdge Servers 11G
- PowerEdge Servers 9G or 10G
1. Introduction
Hardware Diagnostics are embedded tools installed in the pre-OPERATING SYSTEM of your server. Dell provides the hardware diagnostics tools.
It is recommended that you run diagnostics using the Hardware Diagnostics utility, as part of a regular maintenance plan to validate that the attached hardware is functioning properly.
Diagnostics utility has a physical (as opposed to logical) view of the attached hardware, it can identify hardware problems that the operating system and other online tools cannot identify.
You can use the hardware diagnostics utility to validate the memory, I/O devices, CPU, hard drives, and other peripherals.
The procedure depends on your Server Generation, shortcuts and screenshots are available below.
Find detailed information in the User Manual of your PowerEdge Server:
- Go to the PowerEdge section on Dell.com/Support
- Choose the matching system type and click it
- All available manuals are displayed
2. PowerEdge Servers 12G, 13G and all newer generation servers
- Press F10 at startup.
- In the left pane of Lifecycle Controller, click Hardware Diagnostics.
- In the right pane, click Run Hardware Diagnostics. The diagnostics utility is launched.
- Follow the instructions on the screen. When the tests are complete, the results of the diagnostics tests are displayed on the screen. (Figure 1 - in English only)
Troubleshooting Launching Hardware Diagnostics via Lifecycle Controller
Duration: 00:01:09 (hh:mm:ss)
When available, closed caption (subtitles) language settings can be chosen using the CC icon on this video player.

3. PowerEdge Servers 11G
- At startup, press F10 to enter into LifeCycle Controller.
- Click Hardware Diagnostics.
- On the screen, select
- Run Diags to test components (Figure 2 (English-only))
- MPMemory to run diagnostics on the memory modules (Figure 2 (English-only)).
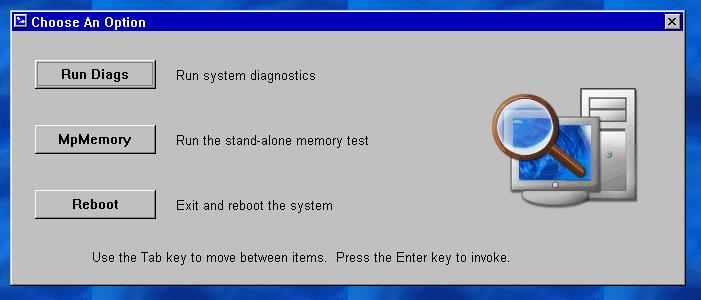
Figure 2: Running the Diags
3.1 Starting the embedded Hardware Diagnostic tool
If you chose to Run Diags, you must:
-
Select Express Test to quick test all components
-
Select Extended Test to test all components intensively
-
Select the Custom Test to test single components
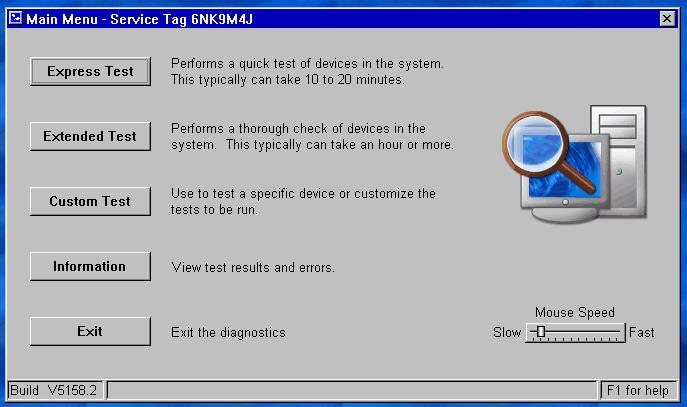
Figure 3: Test Options
Testing one device
-
Choose Custom Test
-
On the next page, you have to select the component you want to test.
For example, for testing a hard disk: (Figure 4-English-only.)- Choose the Drive that you want to test
- Choose the type of Test that you want to perform (for example, Drive Self-Test)
-
Choose your preferred Diagnostic OptionsRecommended:
-
Non-Interactive Tests Only
-
Log output file pathname (to save the results)
-
Continue on Failure (to prevent interruption when failures are found)
-
-
Click Run Test to start the process
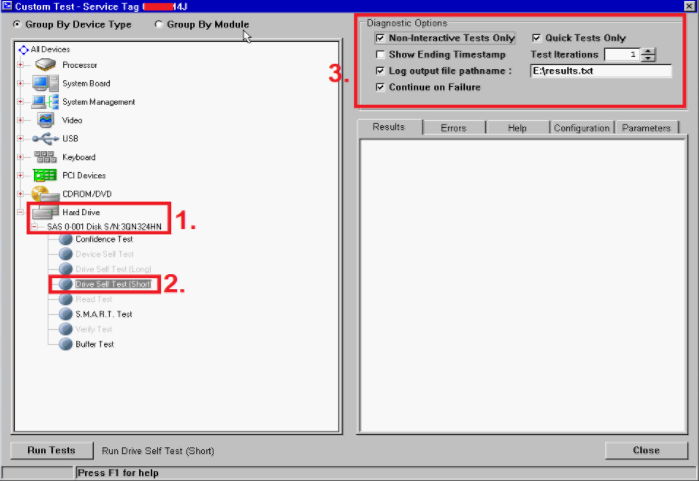
Figure 4: Testing a hard drive
3.2 Memory Diagnostics
MpMemory allows you to check the state of your memory.
If you chose the MPMemory option, you must select the type of test you want to run:
Express or Custom.
For a basic test, you can pick Express.
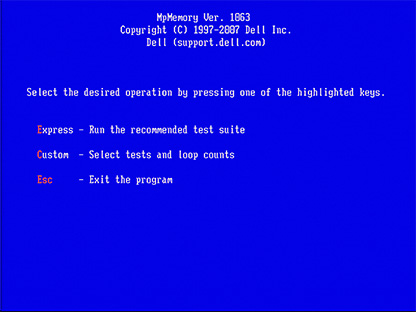
Figure 5: MpMemory (English)
For a Custom test, check the relevant test that you want to pass.
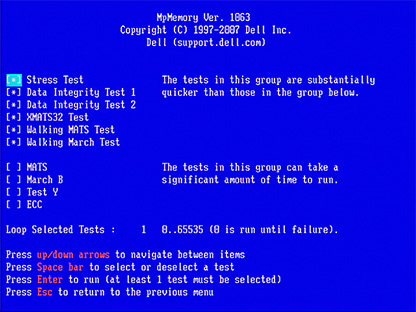
Figure 6: Custom Test (English)
The time it takes to run the test varies depending on the amount of memory installed in your server.
4. PowerEdge Servers 9G or 10G
- Download the latest Dell 32-Bit Diagnostics for your PowerEdge server from Dell.com/Support
- Run the application on your workstation.
- Click Continue.
- Choose a folder where to extract files.
- Click Create a Bootable CD.
- Choose a folder where to save the diags.iso file.
- Burn diags.iso as an image to a CD or mount as virtual media in DRAC or How to Create a Bootable USB Device with Rufus to Update Dell Servers
- Boot the server to CD/virtual media.
- Choose option #2 - DDGUI Graphics based diagnostics.
Do not forget to record the test results.