How to Share Log Files, Screenshots, and Error Messages with Dell
Summary: Instructions on how to upload files, screenshots, and error messages to Service Requests.
Instructions
Why should I use Dell Support to upload logs?
As part of Dells Digital Concierge we have a common entry or staging area for all customer logs.
This fulfills several functions, including:
- Security - A secure protected trusted platform from which customer can enter sensitive data (like Logs) can be uploaded safely into the Dell support sphere.
- AI - From the two entrance points dell.support.com and Tech Direct, logs enter an environment which provides the telemetry data to AI programs to examine and suggest solutions to the engineer.
- Log Tools - From this single staging point, logs are uploaded to an internal environment, from where they are assimilated, organized for engineer use.
- Customer facing - Virtual assistants from the backend interact with AI and log analysis to assist the customer using chats or suggestions and case resolution (Eventually).
Table of Contents:
- Option 1: Use your Dell account.
- Option 2: Without a Dell account, but then stating the file size limitation
- Link to video showing all options.
- If the above options around accounts do not work, then it must be escalated up through the business units.
Instructions
Option 1 - Use your Dell Account.
- Go to Dell.com/Support
- Sign In to your account if you are not already logged in.

Figure 1: Dell Technologies Sign In process.
- For information about registering for a Dell account or updating an existing account, see How to Register for Access to Dell Technologies Online Support or Upgrade an Existing Account.
- Failure to Sign In results in a 50MB max file size and five file max attachment limitation
- Select Support > Service Requests & Dispatch Status

Figure 2: Dell Technologies Support Page
- Search using the Service Request (SR) Number

Figure 3: Dell Support Service Request search
- If prompted, you must enter the email address of the primary case contact
A support agent can find this information by going to the SR and looking at the case contact
- Once a Service Request Number match is found, the Service Request Details page is displayed
- In the Activity Center section of the page, see Attachments.
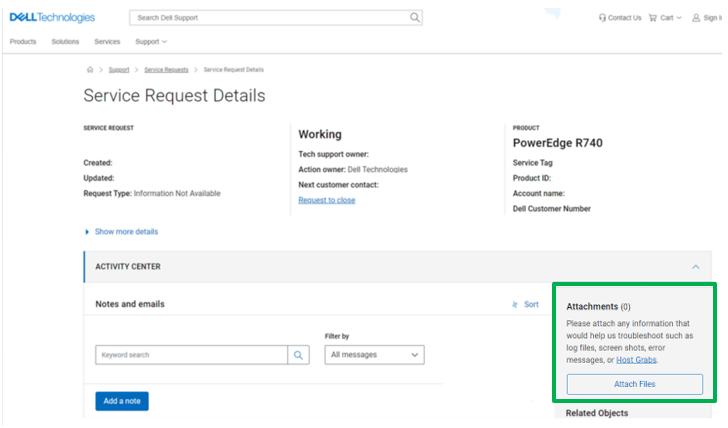
Figure 4: Activity Center Attachments Page
- Click the Attach Files button
- Once the files are added to the upload window, either select Upload (1 by 1) or Upload All

Figure 5: Upload Selected Attachments
- Once the files are uploaded, they are visible within the Dell Ticketing tool and in the agent’s troubleshooting console
Option 2 Uploading Logs without a Dell Account.
(For information about registering for a Dell account or updating an existing account, see How to Register for Access to Dell Technologies Online Support or Upgrade an Existing Account)
- Go to Dell.com/Support
(Because you are not signing in, there is a 50MB max file size and five file max attachment limitation)
Double check this.
- Select Support > Service Requests & Dispatch Status.
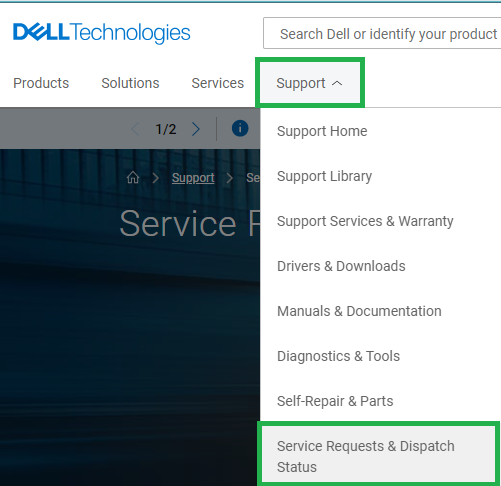
Figure 1: Dell Technologies Support Page
- Search using the Service Request (SR) Number
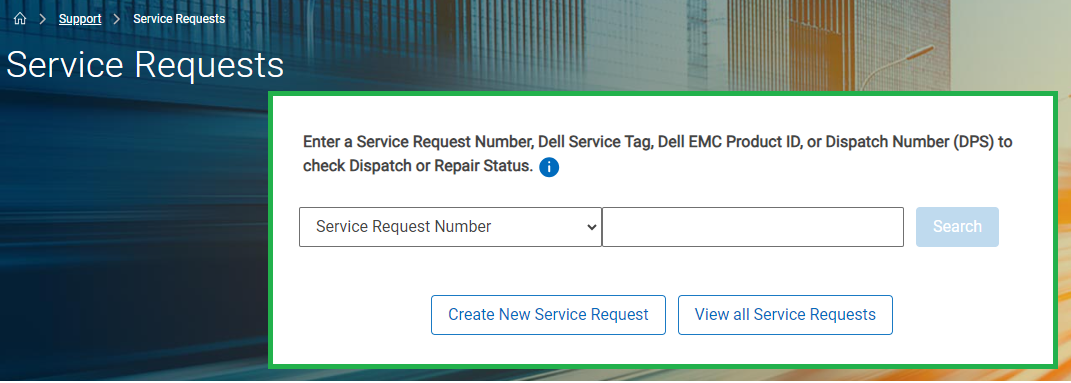
Figure 2: Dell Support Service Request
- If prompted, you must enter the email address of the primary case contact.
A support agent can find this information by going to the SR and looking at the case contact.
- Once a Service Request Number match is found, the Service Request Details page is displayed

Figure 3: Activity Center Attachments Page
- In the Activity Center section of the page, see Attachments.
- Click the Attach Files button
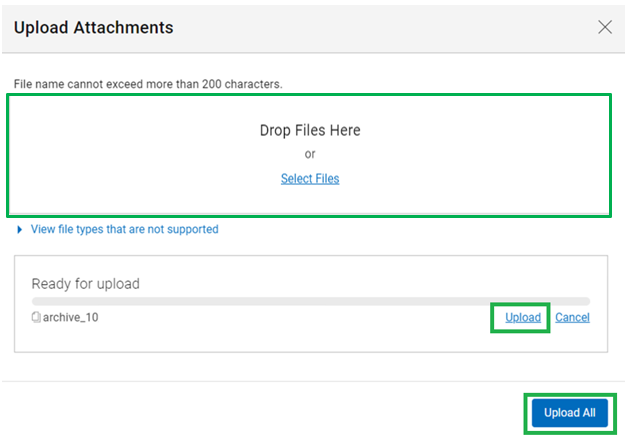
Figure 4: Upload Selected Attachments
- Once the files are added to the upload window, either select Upload (1 by 1) or Upload All
- Once the files are uploaded, they are visible within the Dell Ticketing tool and in the agent’s troubleshooting console