MS365 Hybrid Deployment Process
Summary: This article describes the MS365 Hybrid Deployment process.
This article applies to
This article does not apply to
This article is not tied to any specific product.
Not all product versions are identified in this article.
Instructions
Table of Contents:
- What is Hybrid Deployment?
- How Hybrid Works
- AAD Connect Configuration
- Hybrid Configuration Wizard
- Migrate a Mailbox in EAC
- Migrate a Mailbox in PowerShell
Hybrid Deployment
What is Hybrid Deployment?
- It offers organizations the ability to extend the feature-rich experience and administrative control they have with their existing on-premises exchange organization to the cloud.
- It provides the seamless look and feel of a single Exchange organization between an on-premises Exchange organization and Exchange Online in Microsoft Office 365.
Why Hybrid Deployment?
- Flexibility
- Manageability
- On-premise customization
- Foster real-time collaboration
- Scalability
Hybrid Features and Benefits
- Secure mail routing between on-premises and Exchange Online organizations.
- Mail routing with a shared domain namespace. For example, both on-premises and Exchange Online organizations use the @contoso.com SMTP domain.
- A unified global address list (GAL), also called a "shared address book."
- Free/busy and calendar sharing between on-premises and Exchange Online organizations.
- Centralized control of inbound and outbound mail flow. You can configure all inbound and outbound Exchange Online messages to be routed through the on-premises Exchange organization.
- A single Outlook on the web URL for both the on-premises and Exchange Online organizations.
- The ability to move existing on-premises mailboxes to the Exchange Online organization. Exchange Online mailboxes can also be moved back to the on-premises organization if needed.
- Centralized mailbox management using the on-premises Exchange admin center (EAC).
- Message tracking, MailTips, and multi mailbox search between on-premises and Exchange Online organizations.
- Cloud-based message archiving for on-premises Exchange mailboxes. Exchange Online Archiving can be used with a hybrid deployment. Learn more about Exchange Online Archiving at Archive Features in Exchange Online Archiving.
How Hybrid Works
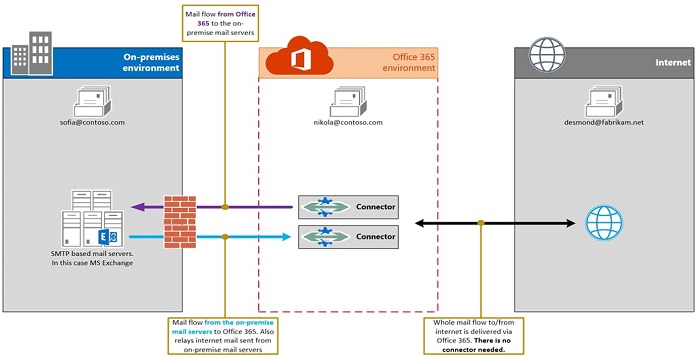
Mail Flow in Hybrid:
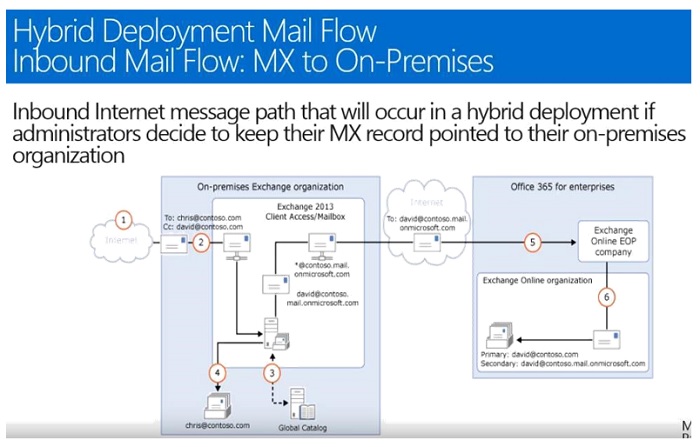
- MX record is pointed to On-Premise with disabled-Centralized Mail Flow.
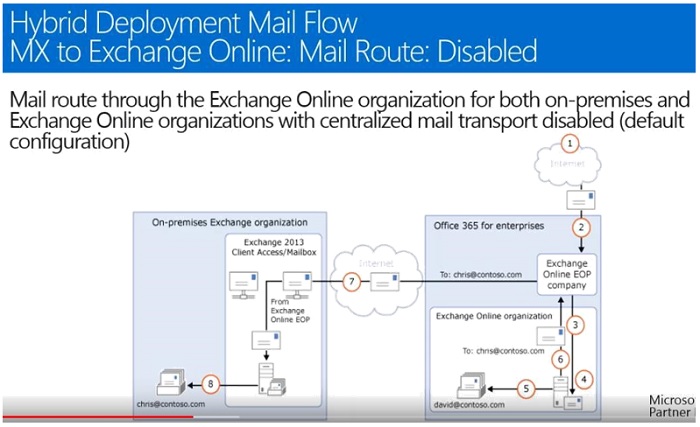
- MX record is pointed to Exchange Online with disabled-Centralized Mail Flow.
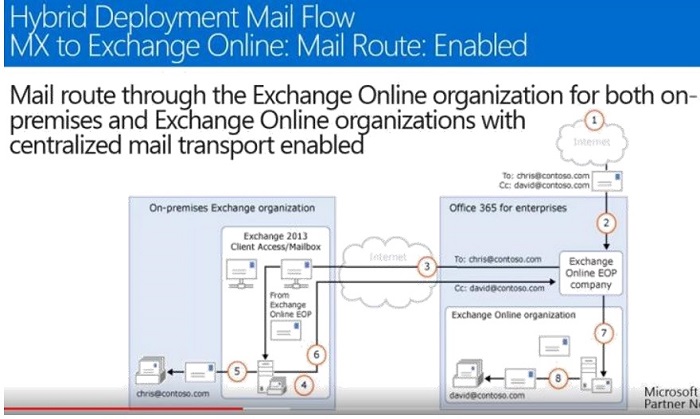
- MX record is pointed to Exchange Online with Centralized Mail Flow.
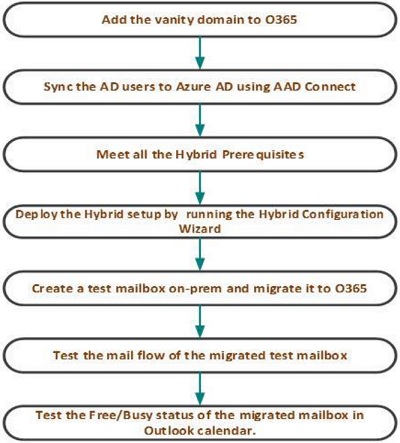
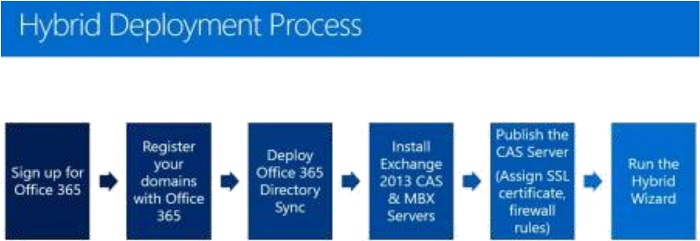
Stages of Hybrid Exchange Deployment:
- Adding the domain in Office 365.
- Adding users to Office 365 using the AAD connect tool.
- Checking and complying of the Hybrid Prerequisites.
- Hybrid Configure Wizard deployment.
- Migration of test mailbox(es).
- Mail flow test.
- Free/Busy test.
Scope of the Hybrid Migration:
- Pre-requisites of Hybrid Exchange Deployment must be completed by organization or the admin before proceeding with the Hybrid Exchange setup.
- Support only guides the customer but does not perform any changes on any of the customers on-premises configuration.
- Complete Hybrid Configuration setup assistance.
- Once we have completed running the Hybrid Configuration Wizard, support migrates a test mailbox to Office 365. Support tests the mail flow and connectivity of Office 365 on and off premises.
- Once it is confirmed that everything works as expected with the test mailbox, support provides a walkthrough on creating a migration batch.
Prerequisites for Hybrid Deployment
Outlined below are the requirements to meet before deploying the exchange-hybrid environment. If one requirement is missed, expect technical issues to occur. Errors may occur running the Hybrid Configuration Wizard, during mailbox migration or even on mail flow after deploying hybrid.
- On-Premise Exchange Server - Exchange Server build numbers and release dates.
- Exchange 2010
- Must be on Service Pack 3 and Rollup 29 or 30.
- At least one server with the mailbox, Hub Transport, and Client Access server roles installed.
- While it is possible to install the mailbox, Hub Transport, and Client Access roles on separate servers, we recommend you install all roles on each server. This provides additional reliability and improved performance.
- Get-Command Ex-Setup | ForEach {$_.FileVersionInfo}
- Exchange 2013
- Must be on CU 22 or 23.
- At least one server with the mailbox and Client Access server roles installed.
- While it is possible to install the mailbox, Hub Transport, and Client Access roles on separate servers, we recommend you install all roles on each server. This provides additional reliability and improved performance.
- Get-ExchangeServer | Format-List Name,Edition,AdminDisplayVersion
- While it is possible to install the mailbox, Hub Transport, and Client Access roles on separate servers, we recommend you install all roles on each server. This provides additional reliability and improved performance.
- Exchange 2016
- Must be on CU 18 or 19.
- At least one server that has the mailbox server role installed.
- Get-ExchangeServer | Format-List Name,Edition,AdminDisplayVersion
- Exchange 2019
- Must be on CU 7 or 8.
- At least one server that has the mailbox server role installed.
- Get-ExchangeServer | Format-List Name,Edition,AdminDisplayVersion
- Exchange 2010
- Custom and Vanity domains to use should have been verified and added in O365. - Add a domain to Microsoft 365
- Azure AD Connect installed and configured for Hybrid Migration.
- Ensure that users are synced with AD.
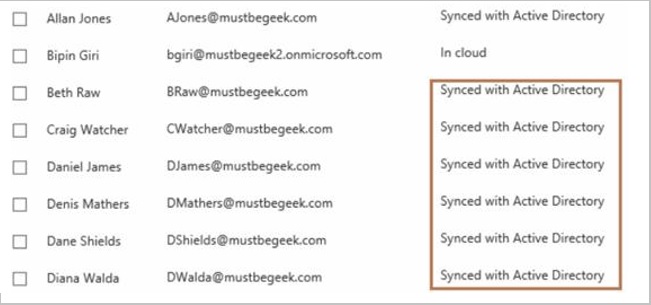
- Ensure that users are synced with AD.
- Obtain a third-party SSL Certificate (Certificate requirements for hybrid deployments).
- It must not be self-signed.
- When configuring a hybrid deployment, you must use and configure certificates that you have purchased from a trusted third-party CA.
- The certificate must be installed on all on-premises mailbox (Exchange 2016 and newer), and mailbox and Client Access (Exchange 2013 and older) servers.
- Hybrid deployment in organizations with Exchange servers that are deployed in multiple Active Directory forests must use separate third-party CA certificates for each Active Directory forest.
- Wild-card certificate is supported.
- For nonwild card, it must contain the three major services within the certificates' Subject Alternative Name (SAN):
- Exchange FQDN - mail.company.com
- Autodiscover - autodiscover.company.com
- Primary-shared SMTP domain - companydomain.com
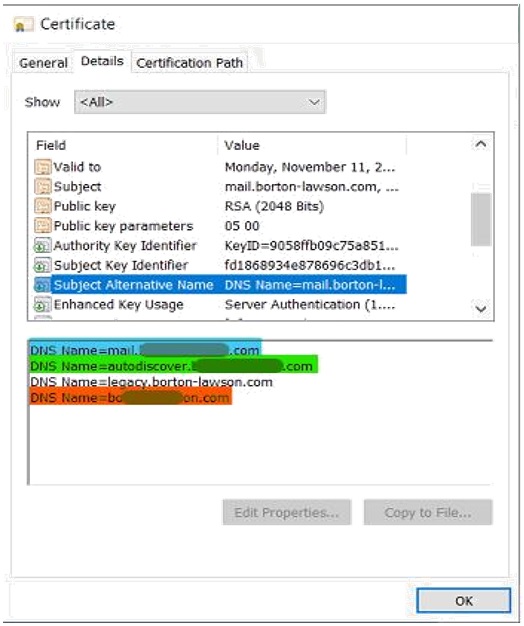
- To verify if the certificate requirements have been met, ask for the URL of their webmail.
- Published Autodiscover DNS records.
- It must be pointed to on-premises Exchange servers:
- For Exchange 2010 and 2013 - must be pointed to Client Access server.
- For Exchange 2016 and 2019 - mailbox Server.
- It must be pointed to on-premises Exchange servers:
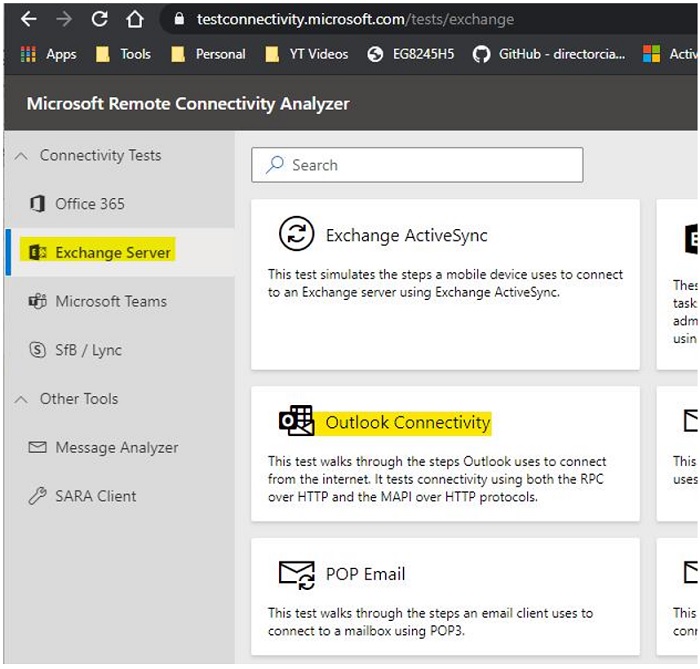
- To test if Autodiscover is published, go to Microsoft Remote Connectivity Analyzer Outlook Connectivity.
- OWA must be accessible externally.
- Ensure that OWA is published and accessible outside of the network to avoid any issues.
- After deployment, On-premise mailbox servers redirect Outlook web requests to either On-premise Exchange 2016 mailbox servers or provides a link to log in to Office 365.
- Ask their OWA URL and try to check if it is accessible in your browser. If it prompted you to log in, then their OWA is accessible. There is no need for you to log in as you are just testing if the OWA is accessible on external network.
- Allow Office 365/Exchange Online IP address on firewall ports (443, 25 and 80).
- The admin must create a rule in their firewall to allow or allowlist the Exchange Online IP address to ports 443, 25 and 80. This article provides the list of Exchange Online IP Addresses and ports that are required to allow or allowlist - Office 365 URLs and IP address ranges.
- Ensure that all Windows Patches are installed on the Server.
- The Windows Server where the On-Premise Exchange Server is housed must be on the latest update.
- There must be no pending Windows Server updates and ensure that all necessary updates have been installed. Hybrid Configuration Wizard only runs in Internet Explorer browser.
- Enable MRS Proxy Server in Exchange Server.
- The MRS proxy must be enabled before running the Hybrid Configuration Wizard (HCW).
- To confirm if it is enabled or not:
- Get-WebservicesVirtualDirectory | FL server,mrs
- To enable the MRS Proxy
- Get-WebServicesVirtualDirectory | FL Identity,MRSProxyEnabled Or Set-WebServicesVirtualDirectory -Identity "EWS (Default Web Site)" -MRSProxyEnabled $true
- To confirm if it is enabled or not:
- The MRS proxy must be enabled before running the Hybrid Configuration Wizard (HCW).
AAD Connect Configuration
- Create a local AD Account that is dedicated for the Azure AD Connect.
- Choose a name that could easily distinguish that it is for Azure AD connect i.e. AADConnectuser@domain.com
- Do not set the account or password to expire.
- This account must be a member of Domain Users and Administrators security group.
- This account must not be a member of Enterprise and Doman admins.
- This account must be assigned with the "Replicating Directory Changes" and "Replicating Directory Changes All" permission in AD.
- Reference:
- Install and configure the AAD Connect for a Hybrid migration. Download AAD here:
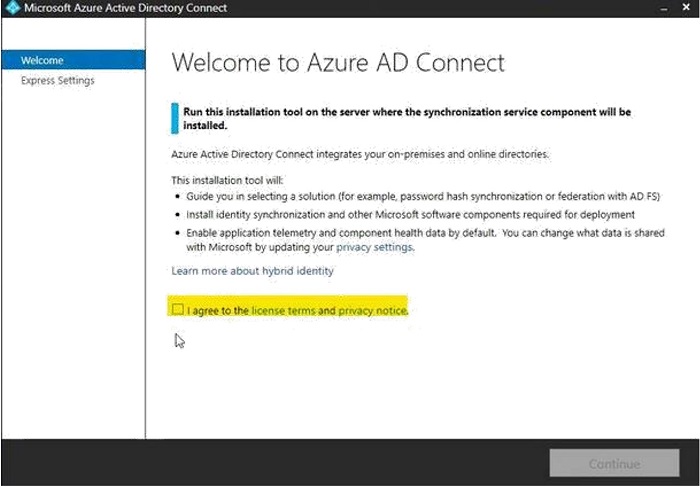
- Select the "I agree to the license terms and privacy notice" check box, then click Continue.
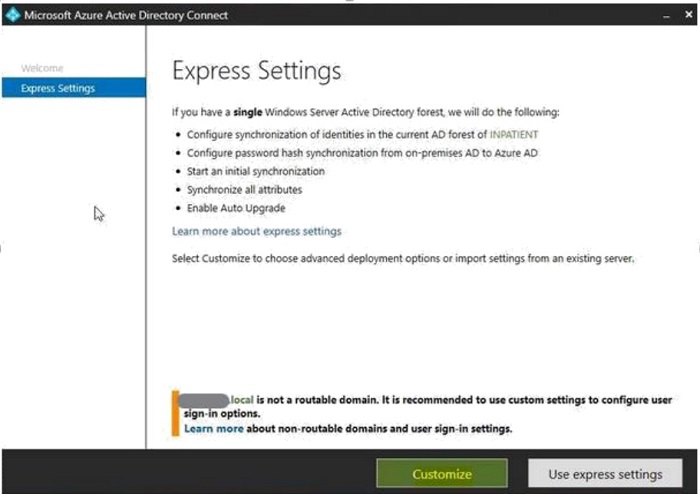
- On the Express Settings tab, click "Use express settings" if the environment has a single Active Directory forest, otherwise click "Customize".
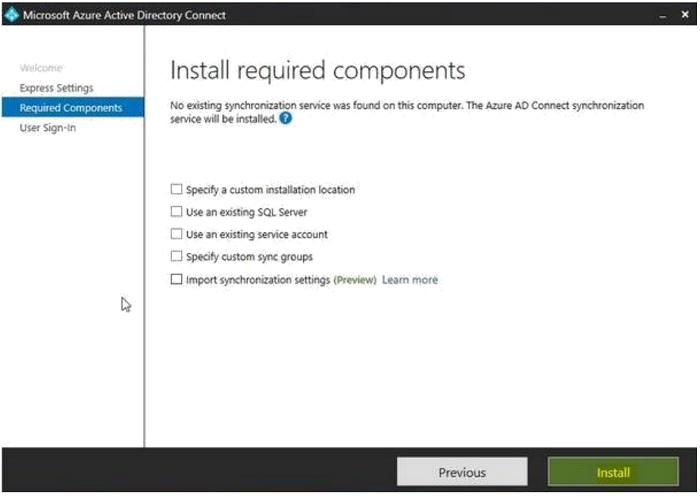
- Select the required components that suit your environment, then click "Install".
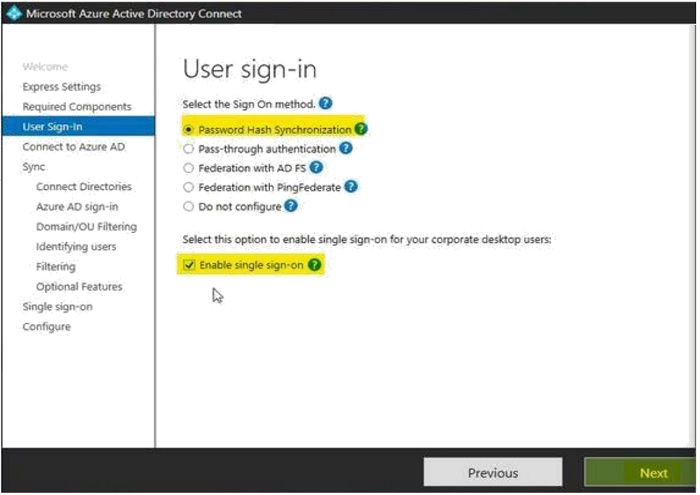
- Select the desired user sign-in attributes, then click "Next".
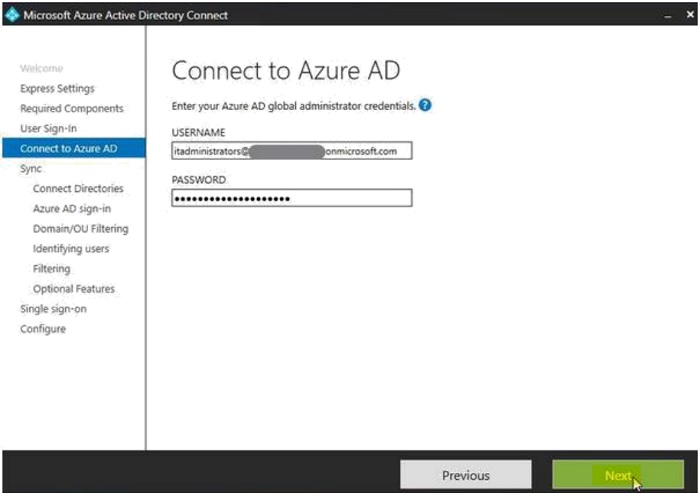
- To connect to Azure AD, enter the global administrator credentials and then click "Next".
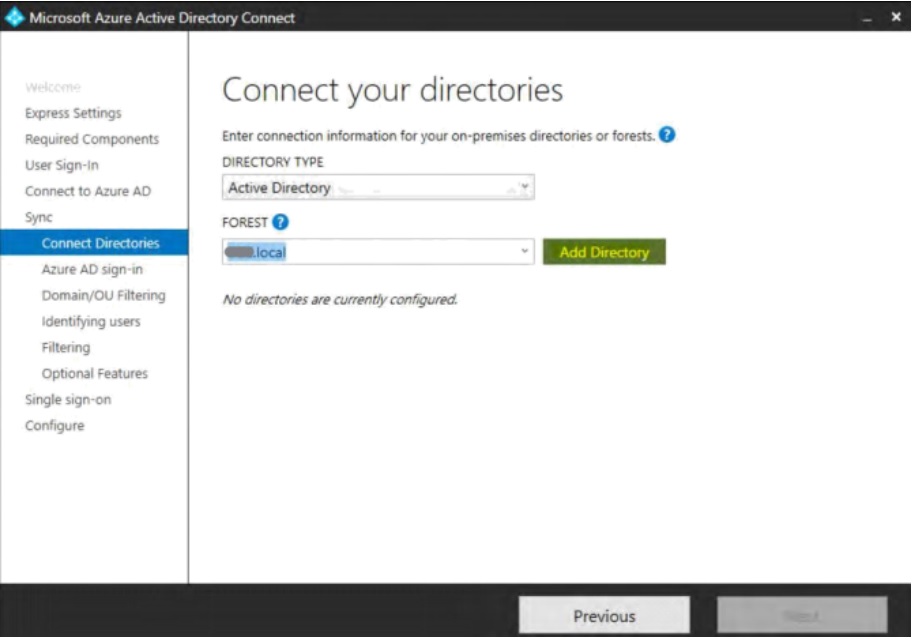
- Select the Directory type, then add forest directories by clicking Add Directory.
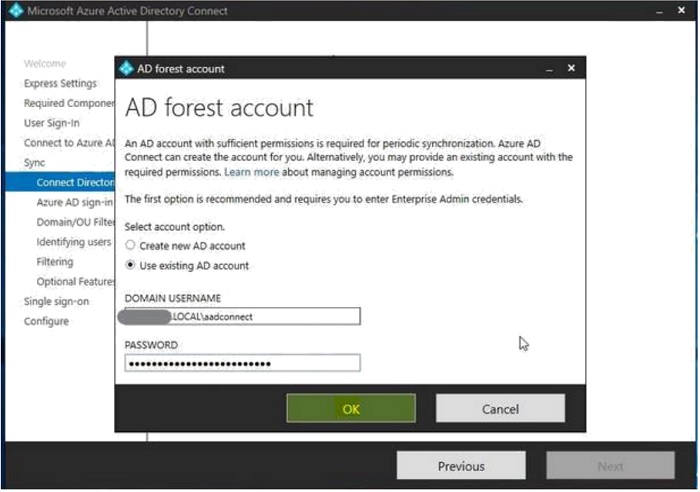
- In the AD forest account pop-up screen, enter the domain credentials and click "Ok".
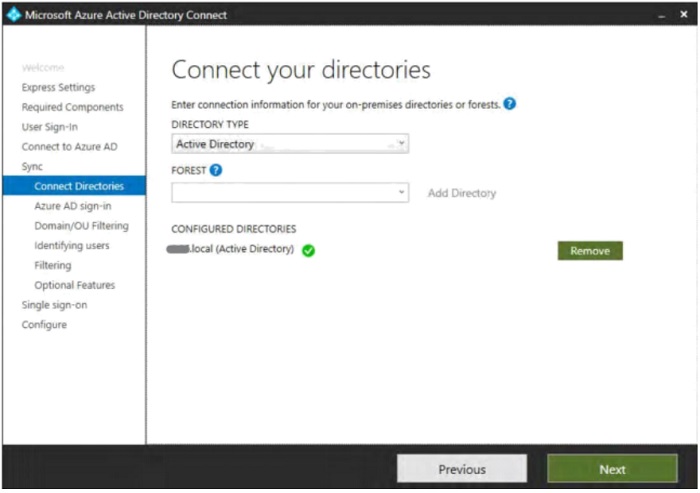
- With the Directory and Forests defined, click "Next".
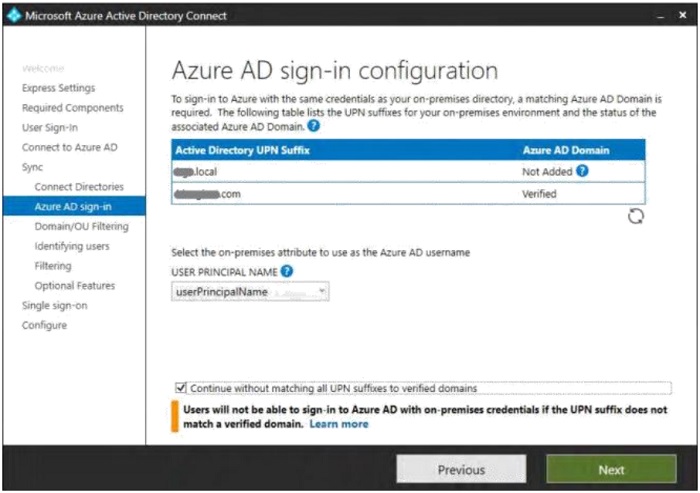
- On the Azure AD sign-in tab, select "Continue without matching all UPN suffixes to verified domains".
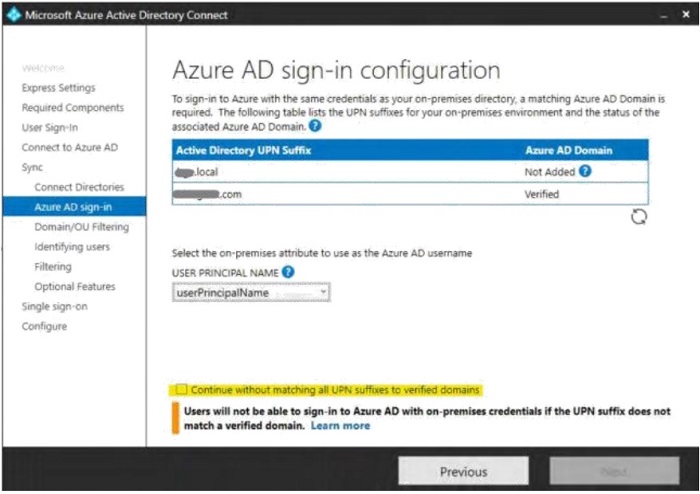
- Click "Next".
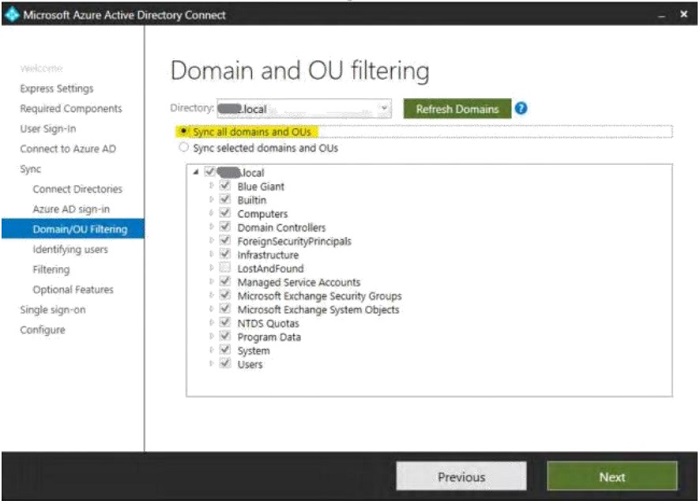
- Select "Sync all domain and OUs", then click "Next".
- Select how your users are identified, then click "Next".

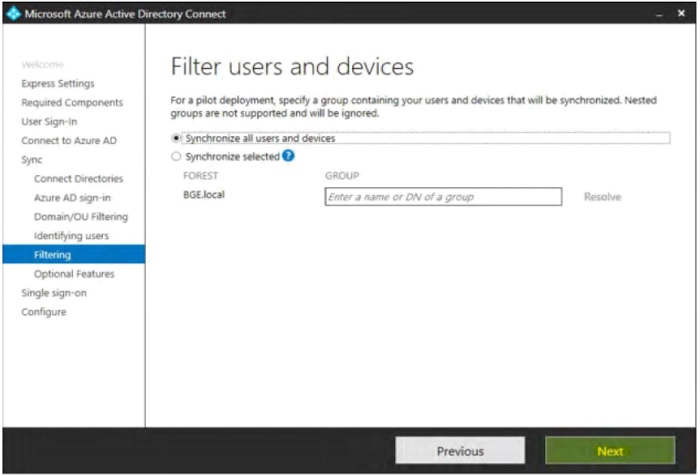
- On the Filter users and devices, select "Synchronize all users and devices", then click "Next".
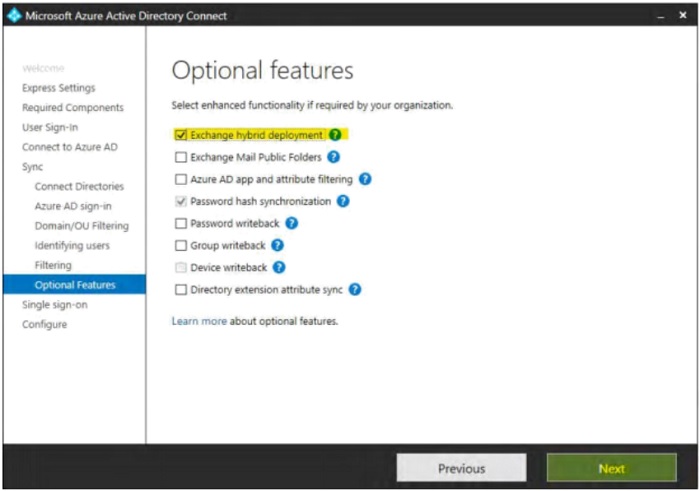
- Select the desired optional features, then click "Next".
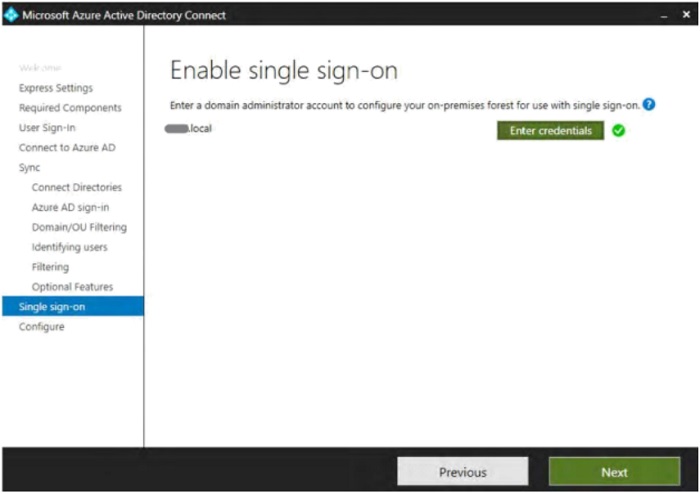
- On the Enable single sign-on tab, select "Enter credentials".
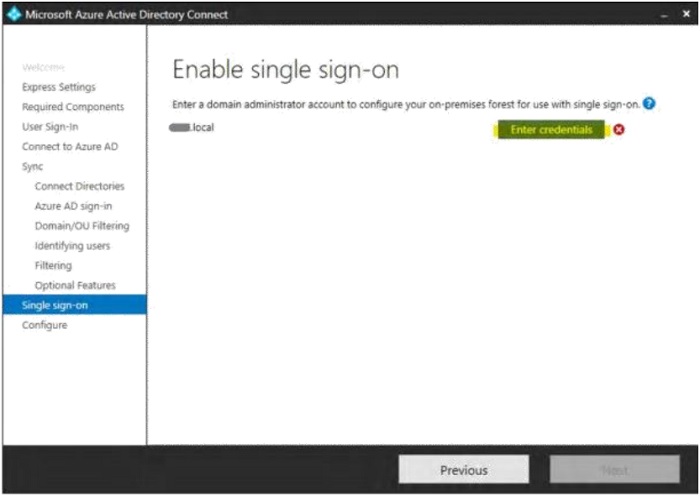
- Click "Next".
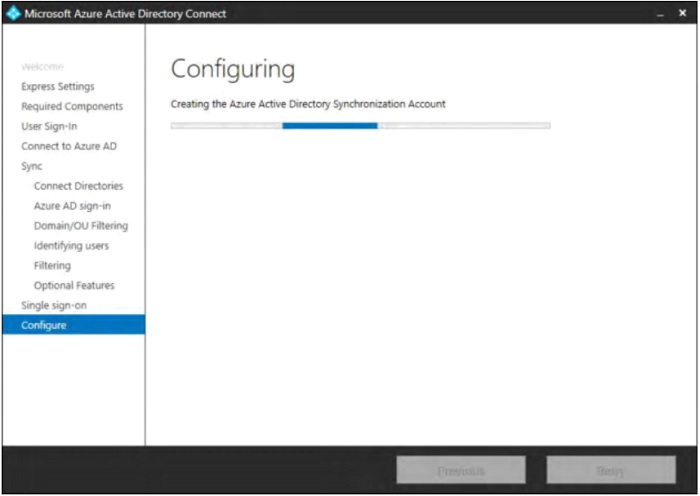
- Select additional conditions if desired, then click "Install".

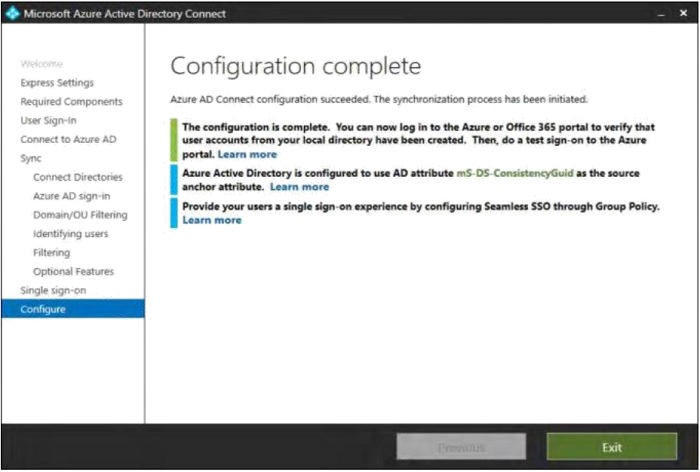
- Progress of configuration is displayed.
- Click "Exit" when configuration is complete.

Hybrid Configuration Wizard (HCW)
- Remote into your On-premise Exchange server.
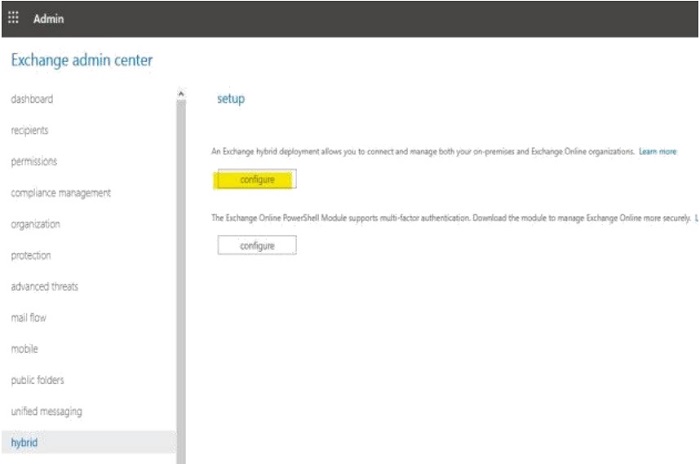
- Open a browser and login to the Office 365 Exchange Admin Center > hybrid. Under Exchange Hybrid Deployment, you can connect and manage both your on-premises and Exchange Online organizations. Click "Configure".
- Download and run the downloaded HCW exe file.
- Follow the steps in the wizard:
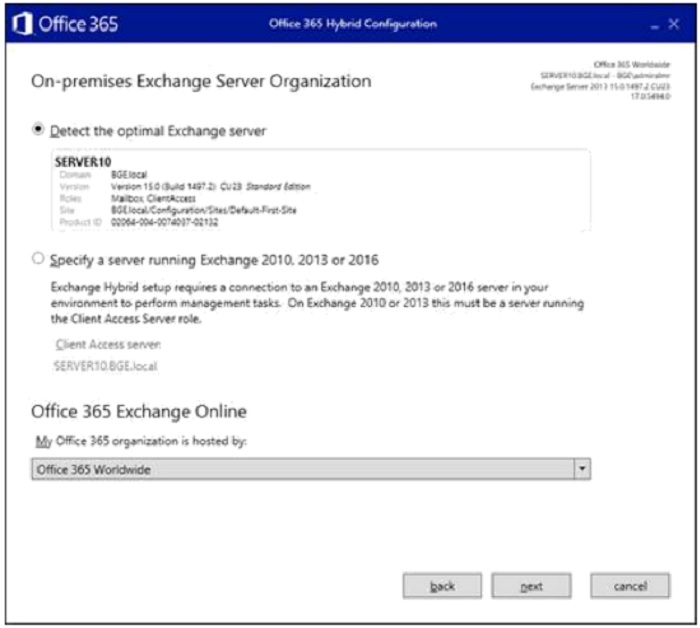
- On the initial page, click "Next".

- The HCW detects the Exchange server automatically, unless you want to specify the server. Click "Next".
- Sign in to respective and global accounts for Exchange on-premises and Office 365 using the "Change" button.
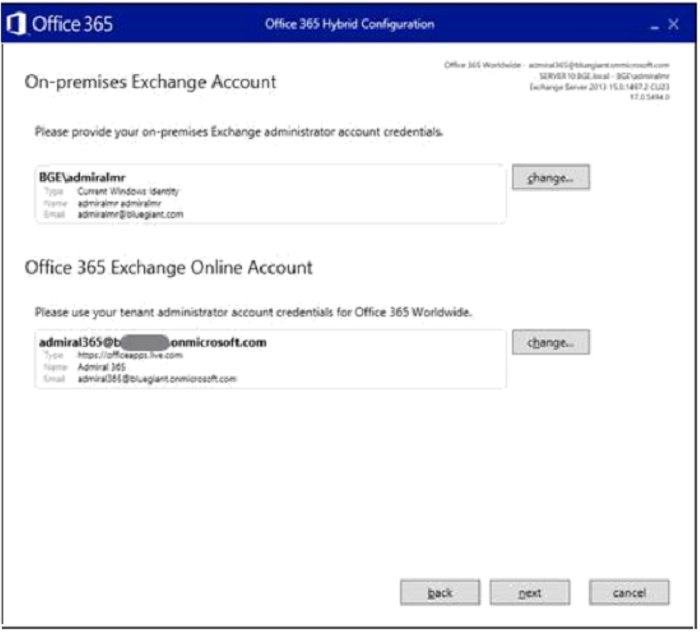
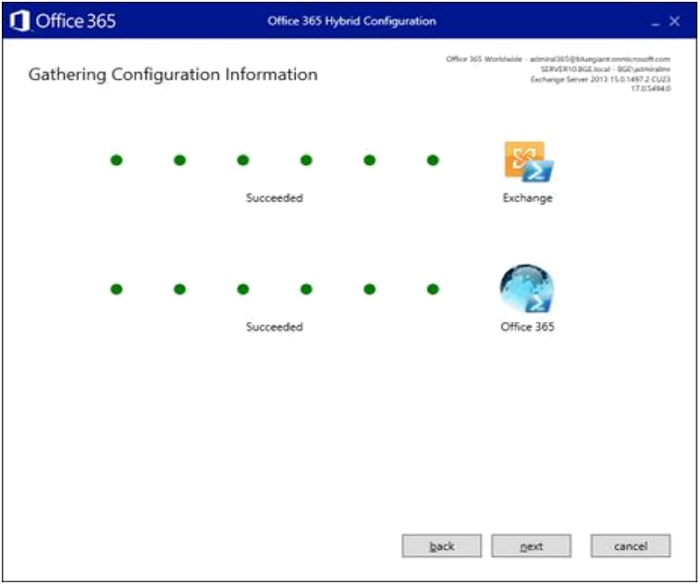
- Once the configuration information is gathered, click "Next".
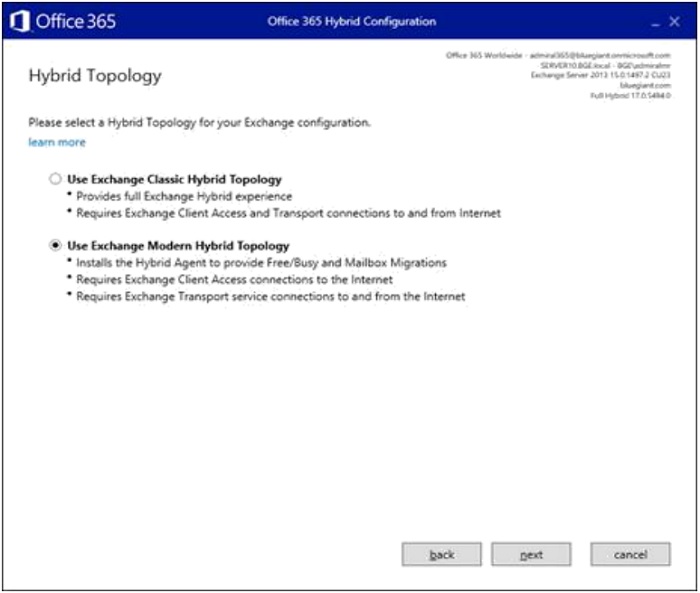
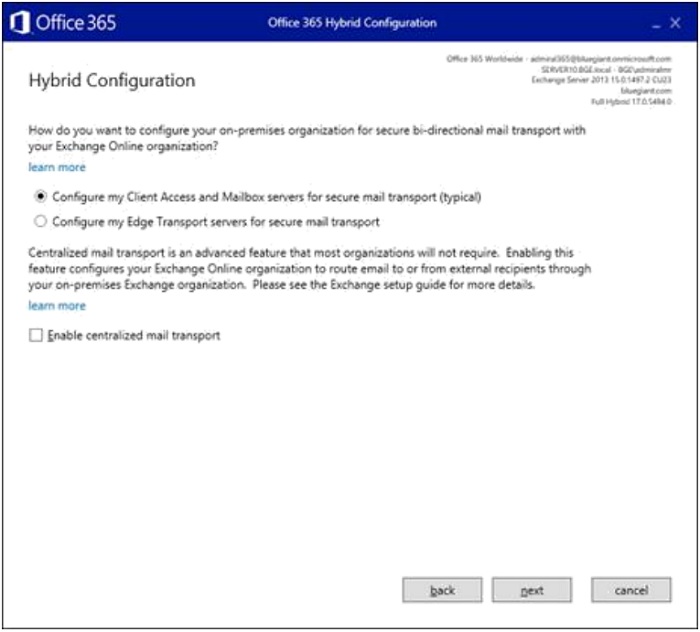
- Select "Full Hybrid Configuration", then click "Next".

- Select "Use Exchange Modern Hybrid Topology", then click "Next".
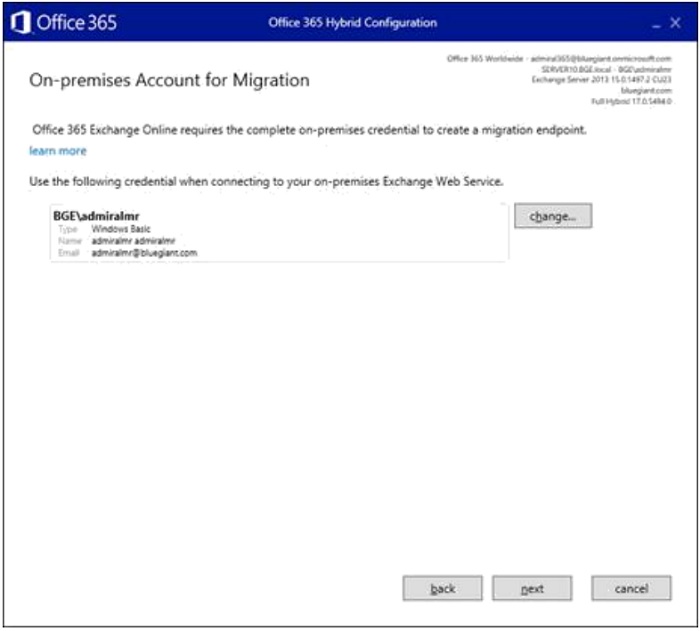
- Enter the local admin account, then click "Next".
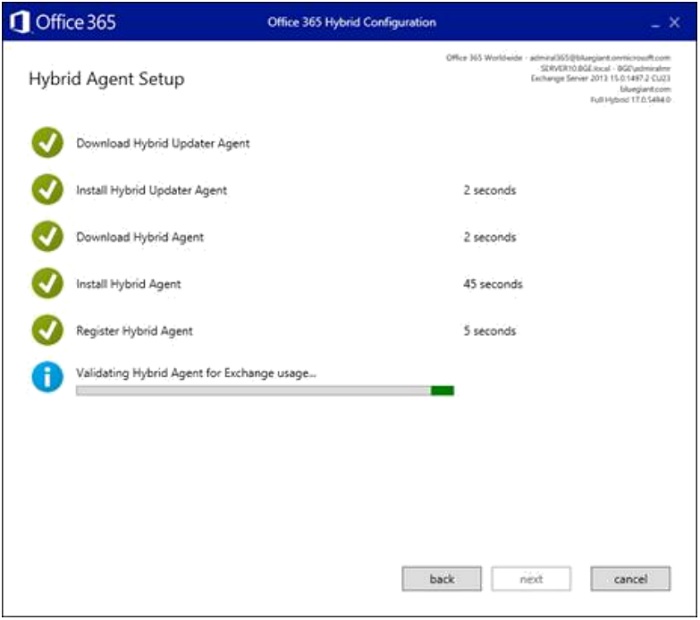
- Click "Next" once the Hybrid Agent completes setup.
- Select the typical mail flow direction. Click "Next".
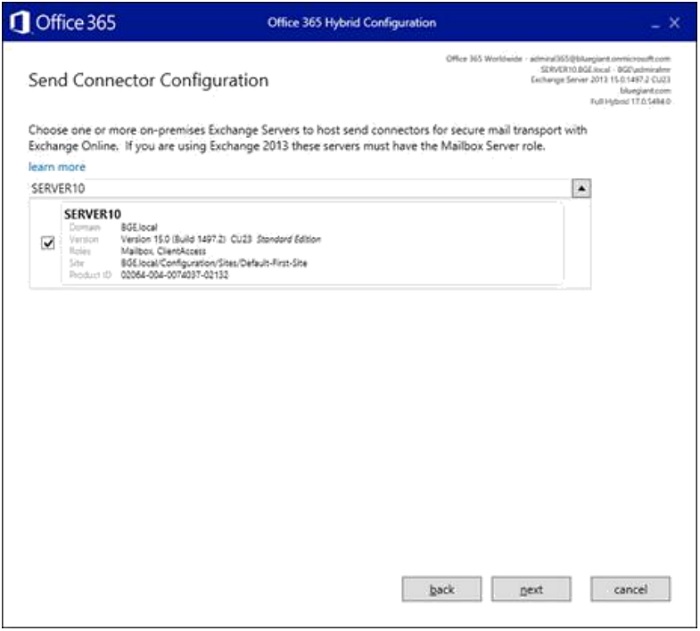
- The Receive Connector is also created on the same server. Click "Next".

- Similar to the Receive Connector, click "Next".
- Select your third-party SSL certificate. If more than one certificate is available, ensure that the ones for the Exchange Server are selected. Click "Next".
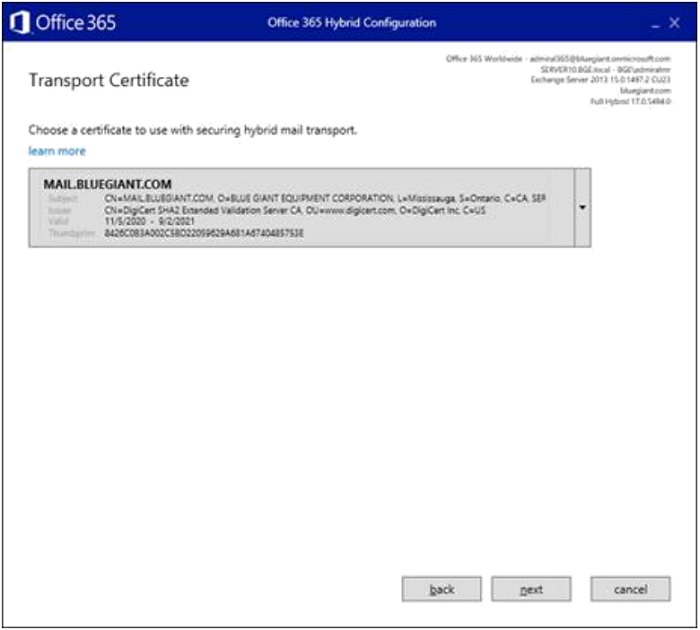
- Enter the on-premises Exchange FQDN. This must be the same FQDN shown in the third-party SSL certificates' SAN (i.e. Mail.companydomain.com). Click "Next".

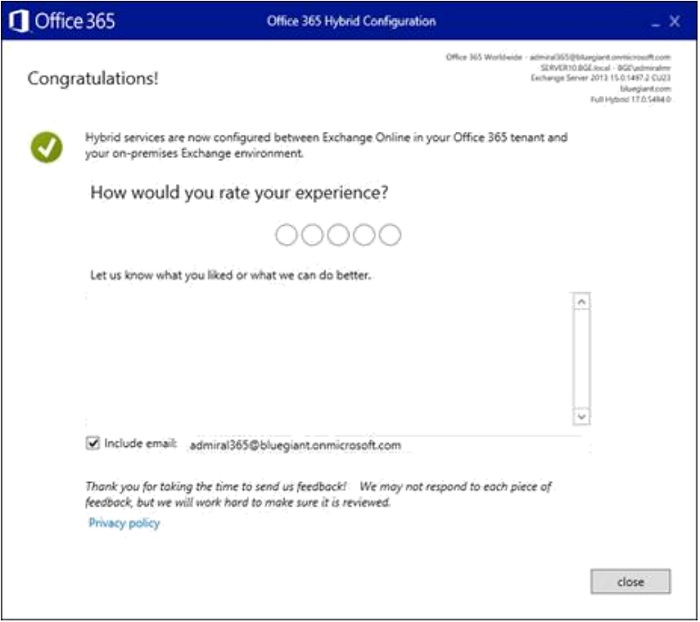
- Click "Update" and let it run until it completes.

- You have successfully deployed the Hybrid environment. You may start migrating mailboxes!
- On the initial page, click "Next".
Migrate a mailbox in EAC
There are two ways to migrate an on-premises exchange mailbox:- Using the interface via the Remote mailbox move tool in Exchange Admin center.
- Using PowerShell scripts.
Remote mailbox Move
- https://docs.microsoft.com/en-us/exchange/hybrid-deployment/move-mailboxes
- https://docs.microsoft.com/en-us/exchange/mailbox-migration/manage-migration-batches
Once HCW has been successfully installed without errors, you may now start moving or migrating mailboxes from on-premises Exchange to Office 365. Achieve this via the Remote mailbox Move tool available in the Exchange Admin center.
- Log in to the Microsoft 365 Admin portal and go to Exchange Admin Center.
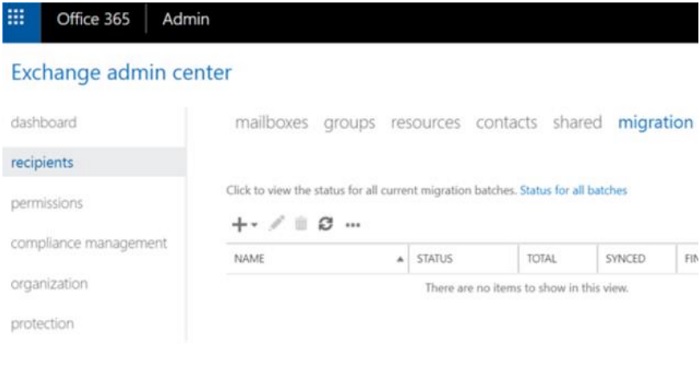
- In the left pane, click "Recipients", then go to the Migration tab by clicking "migration" at the top. Click the add button (Plus sign) and select "Migrate to Exchange Online".

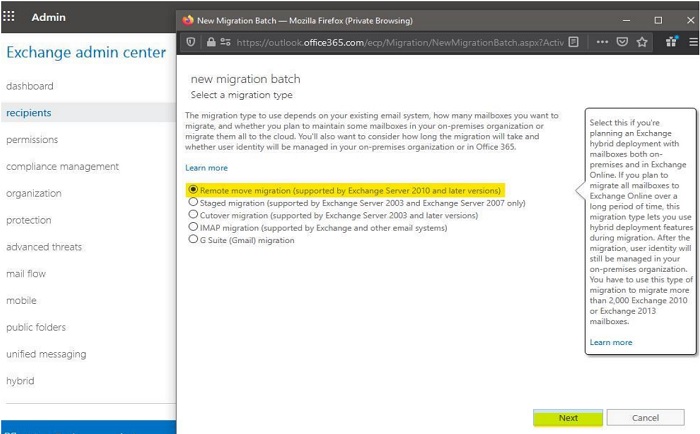
- On the Select a migration type page, select "Remote move migration" and then click "Next".
- On the Select the users page, click the "Add" icon and select the on-premises users to move to Microsoft 365 or Office 365. Click "Add", click "OK", and then click "Next".

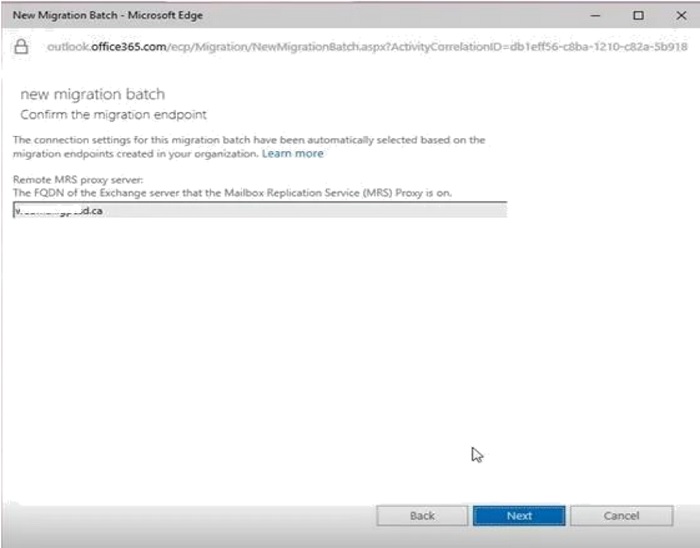
- On the Confirm the migration endpoint page, verify that the FQDN of your on-premises Exchange Server is listed when the wizard confirms the migration endpoint.
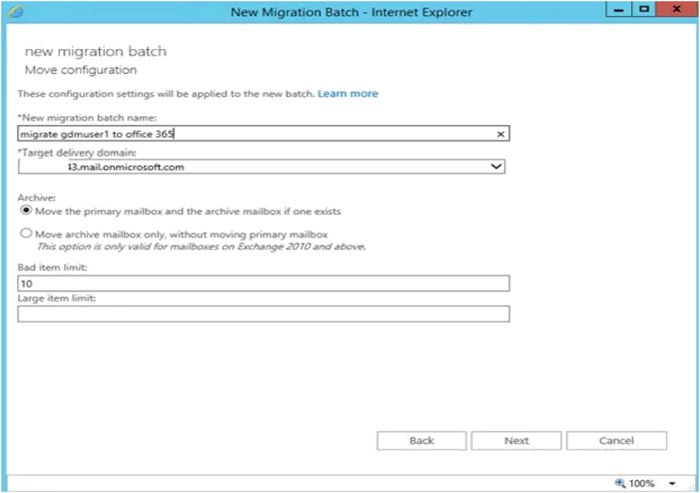
- On the Move configuration page, enter name in the New migration batch name field and then click "Next". (The bad item limit is for corrupted items).
- On the Start the batch page, select at least one recipient to receive the batch-complete report. Verify that the Automatically start the batch option is selected. You can opt to manually or automatically complete a migration batch.
For this example, the Manual Complete the batch was selected. Click "New".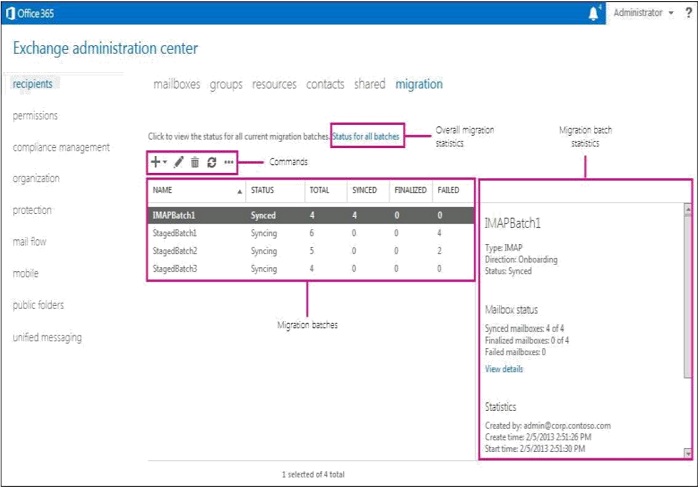
- The migration progress is displayed.
Migrate a mailbox in PowerShell
Before using the Windows PowerShell in migrating a mailbox, ensure it can connect to Exchange Online and all necessary PowerShell modules are installed.- To ensure you can run scripts, run below one-time only:
- Set-ExecutionPolicy Unrestricted -Force
- Install the modules:
- install-module AzureAD
- install-module MSOnline
- Ensure your Windows PowerShell is on the latest version. As of now the latest-supported version is 5.1
- Download and install Windows PowerShell 5.1
Once the Windows PowerShell is geared up, you can start migrating mailboxes using PowerShell scripts.
- Run Windows PowerShell in admin mode.
- Run the scripts below to connect to Exchange Online and Exchange on-premises.
- $UserCredential = Get-Credential
- $ONPREMCREDS = Get-Credential
- $Session = New-PSSession -ConfigurationName Microsoft.Exchange -ConnectionUri https://outlook.office365.com/powershell-liveid/ -Credential $UserCredential -Authentication Basic -AllowRedirection
- Import-PSSession $SESSION -AllowClobber
- Connect-MsolService -Credential $UserCredential
- Move or Migrate a mailbox.
- New-MoveRequest -Identity "INSERT_USER_ALIAS_HERE" -Remote -RemoteHostName hybridserver.domainname.com -TargetDeliveryDomain domainname.mail.onmicrosoft.com -RemoteCredential $ONPREMCREDS -BadItemLimit 1000
- Monitor the migration through the scripts below. You may select which one on the following would work for you.
- Get-MigrationUserStatistics -Identity ex@corp.contoso.com -IncludeReport | Format-List Status,Error,Report
- Get-MigrationUserStatistics -Identity davidp@corp.contoso.com | Format-List SkippedItemCount,SkippedItems
- Get-MigrationUserStatistics -Identity davidp@corp.contoso.com -LimitSkippedItemsTo 20 | Format-List SkippedItemCount,SkippedItems
- Get-MigrationUser -BatchId StagedBatch1 | Get-MigrationUserStatistics
- Get-MigrationUser | Get-MigrationUserStatistics
- Get-MoveRequest | Get-MoveRequestStatistics
- To remove a migration batch, run below:
- Get-MoveRequest | Remove-MoveRequest
References:
- Moving Individual Mailboxes to Office 365 via PowerShell
- Move mailbox to Exchange Online with PowerShell
- Hybrid Deployment Prerequisites
- Microsoft Assistants
- Hybrid Deployment – Delegated mailbox permissions
- Exchange Transport Routing
- Free Busy Issue
- Decommission – Exchange on Premise
Demo Video - Configuring your exchange Hybrid deployment - in a nutshell
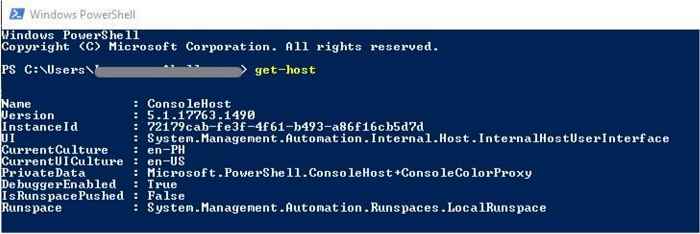
Monitoring the Migration - Admins can monitor the migration through the Exchange Admin Center interface or PowerShell.
M365 Exchange Admin Center
Windows PowerShell
- PowerShell scripts for Microsoft 365
- Get-MigrationUserStatistics
- Get-MoveRequestStatistics
- Get-MigrationBatch
- Complete migration batch with PowerShell
- PowerShell One-Liner: Summary of mailbox Move Request Status
Post Migration Key points
- Customers use their existing Outlook profile.
- No changes made on their current mail flow (MX records, and so forth).
- Mailbox only resides on one location.
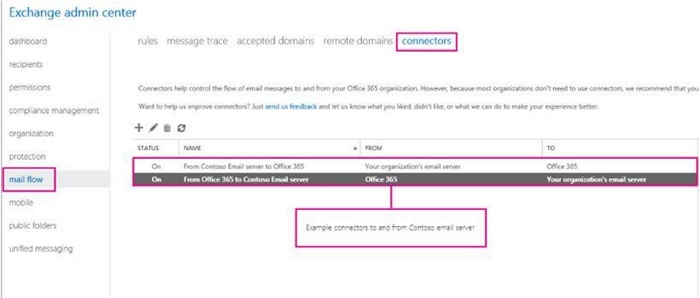
- To verify source set up if on hybrid, log in to EAC > Mail flow > Connectors.
Hybrid Deployment Process
Affected Products
Microsoft 365 from DellArticle Properties
Article Number: 000192645
Article Type: How To
Last Modified: 10 May 2024
Version: 4
Find answers to your questions from other Dell users
Support Services
Check if your device is covered by Support Services.