ChromeOS Post Boot Diagnostics
Summary: General information about the ChromeOS diagnostics tool
This article applies to
This article does not apply to
This article is not tied to any specific product.
Not all product versions are identified in this article.
Symptoms
No symptoms information
Cause
No cause information
Resolution
Table of Contents:
Overview
The new ChromeOS diagnostics tool can be used to investigate the battery, processor, and memory status of a Chromebook in real time.
You can run troubleshooting test routines, where results and telemetric information can be saved in a session log file. This can be used to assist with the following:
- Streamline the troubleshooting process.
- Easier knowledge transfer and sharing of results
- Enable Support Agents to identify the best cost-effective fix and to validate a solution.
When should the Diagnostics tool be used?
- The Chromebook battery is draining fast.
- The Chromebook is running slow.
- The Chromebook is having memory problems.
How to Access the Diagnostics Tool.
You can use the following two methods to access the diagnostics tool.
With the Launcher
- At the bottom left of the screen, select the Launcher (Figure 1).
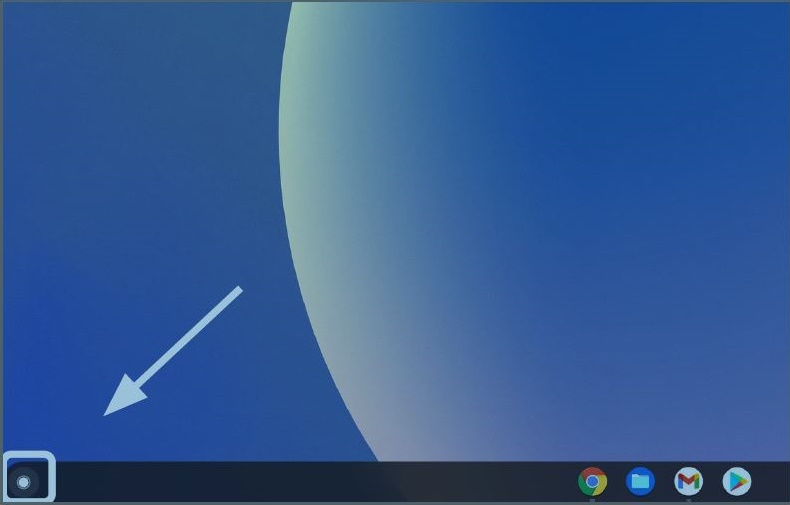
Figure 1: Launcher
- Locate the Omnibox (Figure 2).
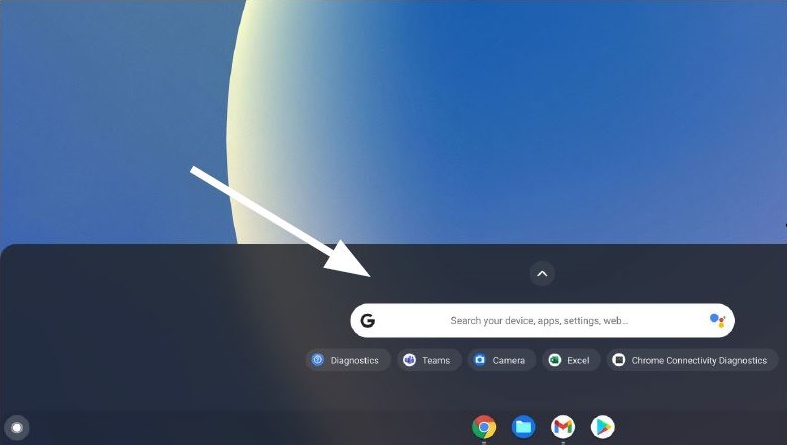
Figure 2: Omnibox
- Type Diagnostics in the Omnibox to locate the tool (Figure 3).
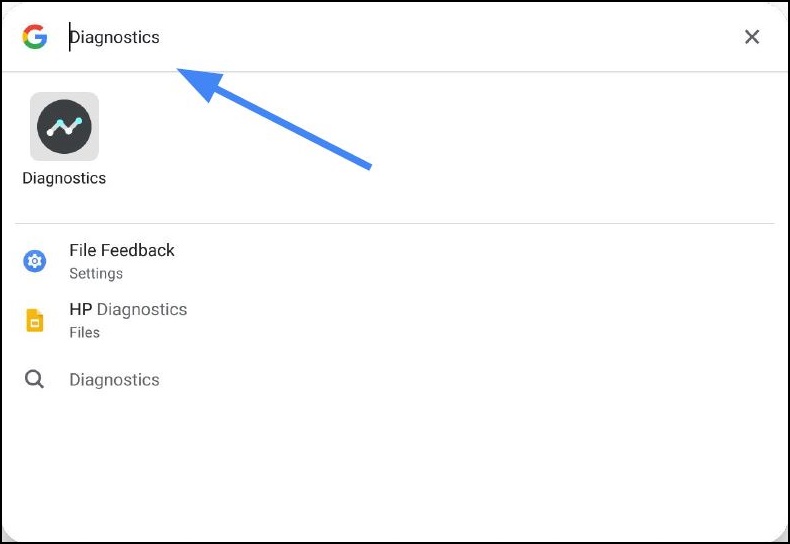
Figure 3: Search for Diagnostics
With the Settings
- At the bottom right of the screen, select the Status Tray (Figure 4).
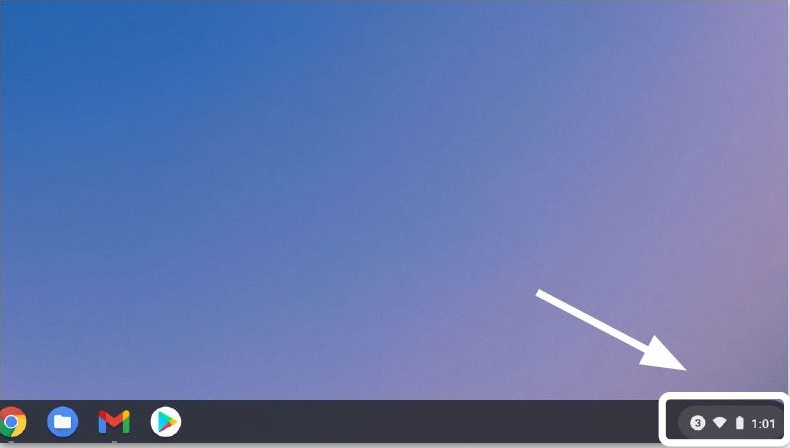
Figure 4: Status tray
- Select Settings (Figure 5).
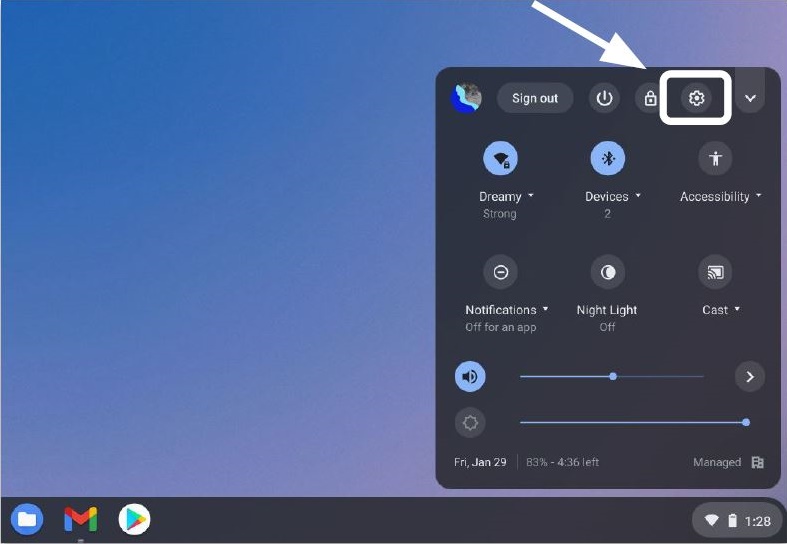
Figure 5: Settings
- Select Search (magnifying glass) (Figure 6).
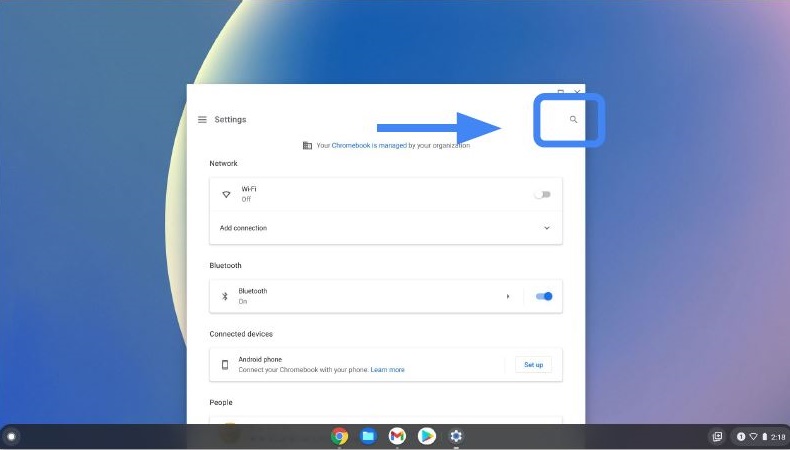
Figure 6: Search
- Type Diagnostics into the Settings search bar. Select Diagnostics in the search results (or press the Enter button) (Figure 7).
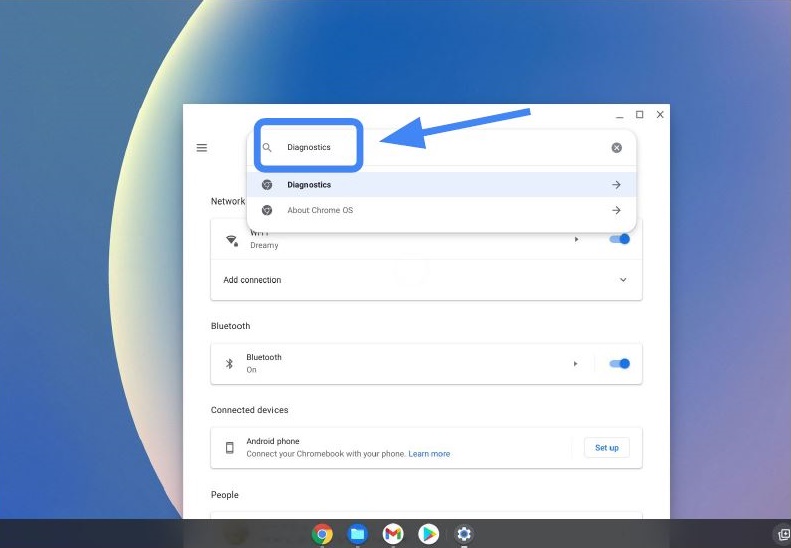
Figure 7: Search for Diagnostics
- Under About ChromeOS, locate and select Diagnostics to open the App (Figure 8).
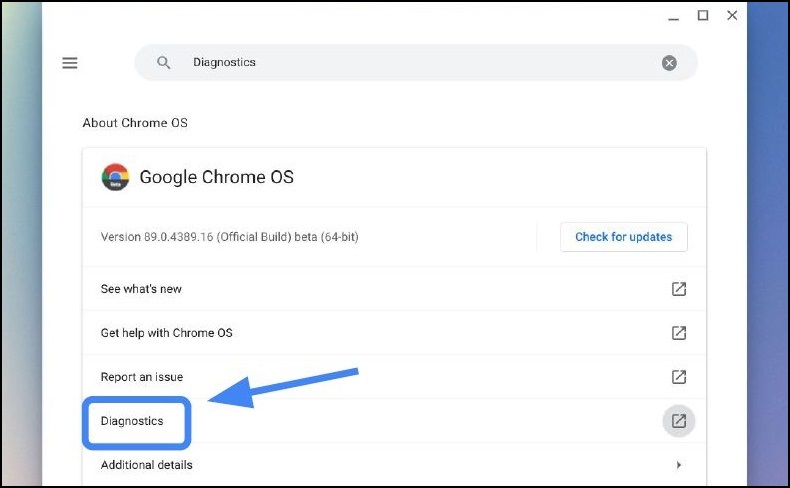
Figure 8: Search results
- Select the diagnostic you would like to run (Figure 9).
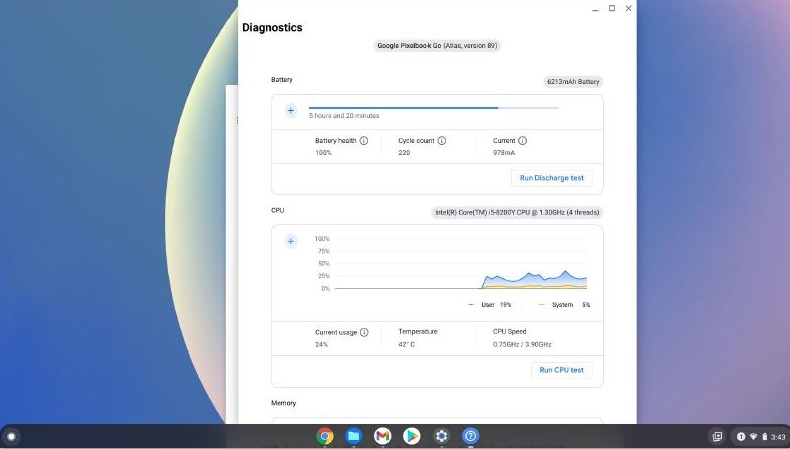
Figure 9: Select the Diagnostics required
Note: Running the processor tests can stress the Chromebook to the point where normal use may be difficult. Typical run times for tests are:
- Battery 10-15 minutes
- Processor 10-15 minutes
- Memory 10-40 minutes
Running the Diagnostics and Test Results.
Use the following steps to run the diagnostics and save the test results.
Note: Only one test can be run at a time. The steps below are for the battery test, but is used as an example.
- Select Run Charge Test (Figure 10).
Assess the discharge rate.
*The Chromebook should be unplugged from AC power for the battery test.
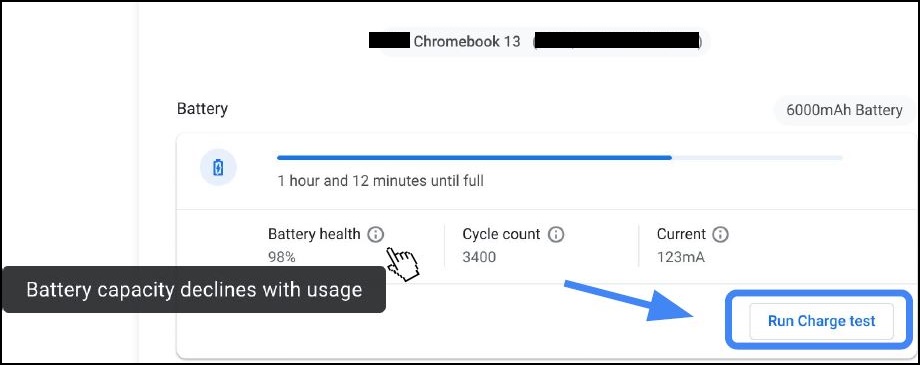
Figure 10: Charge test
- If a test fails in any of the three testing routines, you may investigate more from the Help Center
(Figure 11.)
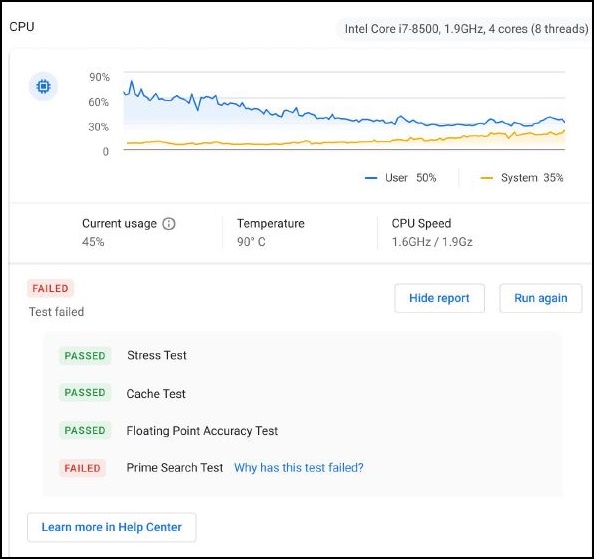
Figure 11: Test fails - Help Center
- A faster way to investigate why certain tests have failed is clicking "Why has this test failed?" (Figure 12)
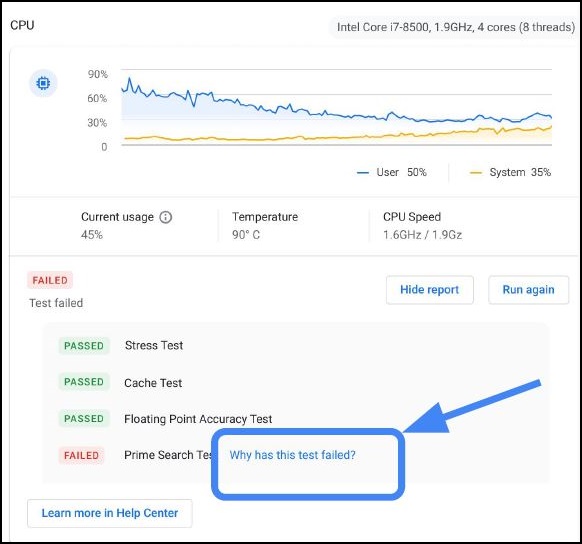
Figure 12: Why has the test failed link
- If a test fails, session logs are saved by clicking Save session log (at the bottom of the Diagnostics tool) (Figure 13).
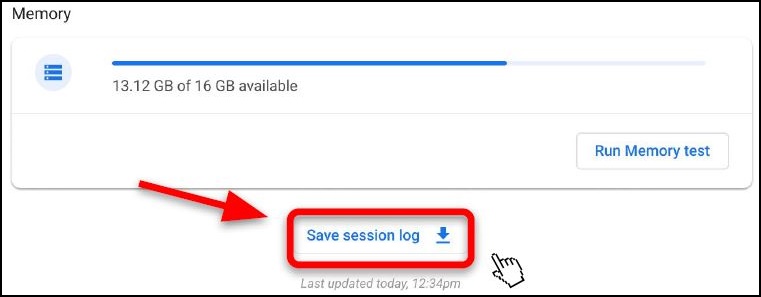
Figure 13: Save session log
- You can download the .txt file and share it using chat support, email, or verbally on the phone (Figure 14).
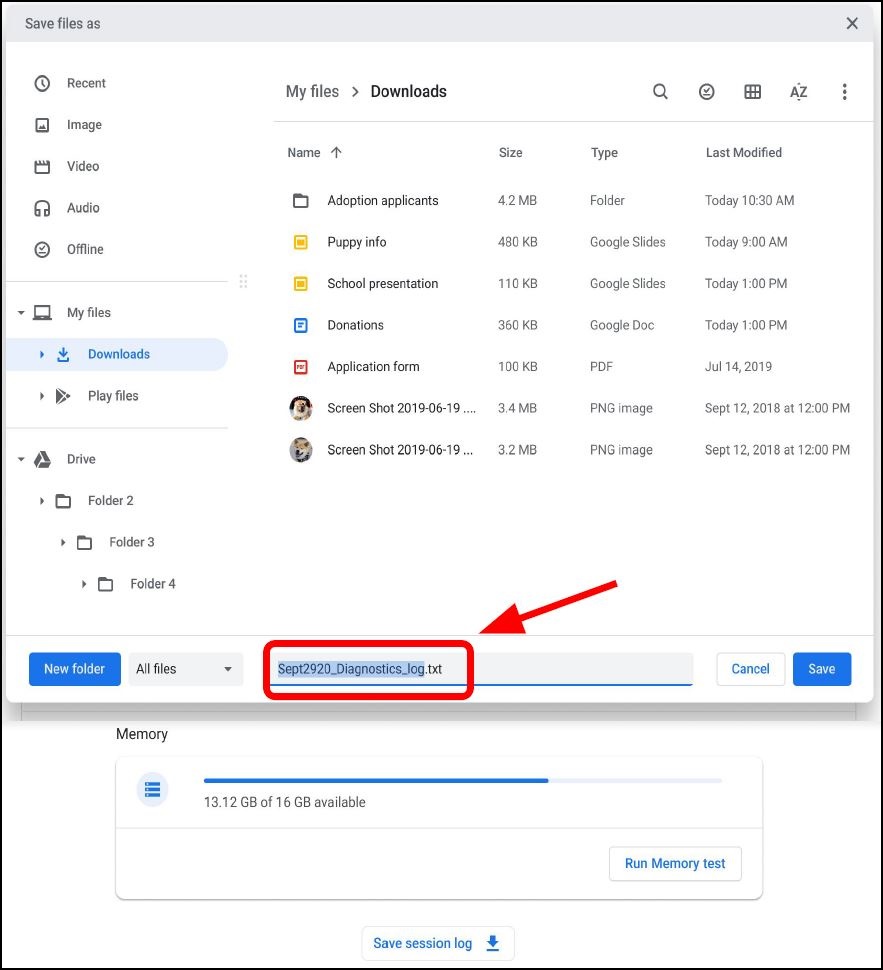
Figure 14: Save the file as .txt
Diagnostic logs are only available on ChromeOS devices running version 90 and above. Learn More About Updating a Chromebook's Operating System.
Affected Products
Chromebook, Chromebook, ChromebookArticle Properties
Article Number: 000186767
Article Type: Solution
Last Modified: 23 Oct 2024
Version: 2
Find answers to your questions from other Dell users
Support Services
Check if your device is covered by Support Services.