Article Number: 000182491
How to Upload Logs to the Netskope Cloud
Summary: Logs may be uploaded to Netskope using these instructions.
Article Content
Instructions
Logs may be uploaded from your enterprise web proxy, next generation firewall, and other devices directly to your tenant instance in the Netskope cloud. This can be done either from the Netskope tenant UI or by using SFTP.
Affected Products:
Netskope
Affected Operating Systems:
Windows
Mac
Linux
Logs may be uploaded from:
- Netskope Tenant UI
- Windows Using SFTP
- Mac or Linux Using SFTP
Also, a Netskope administrator may verify Supported Log Formats.
Click the appropriate option for more information.
Note: For logs greater than 1000 MB in size, it is recommended to upload logs using SFTP.
To upload the logs from the Netskope Tenant UI:
- First, download log files from your supported vendor’s application.
Note: If using an archive (such as .zip), you can only have one log file per archive, and it may not be binary.
- In a web browser, go to the Netskope web console:
- United States Datacenter: https://[TENANT].goskope.com/
- European Union Datacenter: https://[TENANT].eu.goskope.com/
- Frankfurt Datacenter: https://[TENANT].de.goskope.com/
Note: [TENANT] = The tenant name in your environment
- Log in to the Netskope web console.

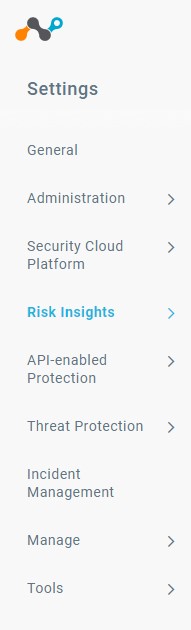
- Click Settings.

- Click Risk Insights.

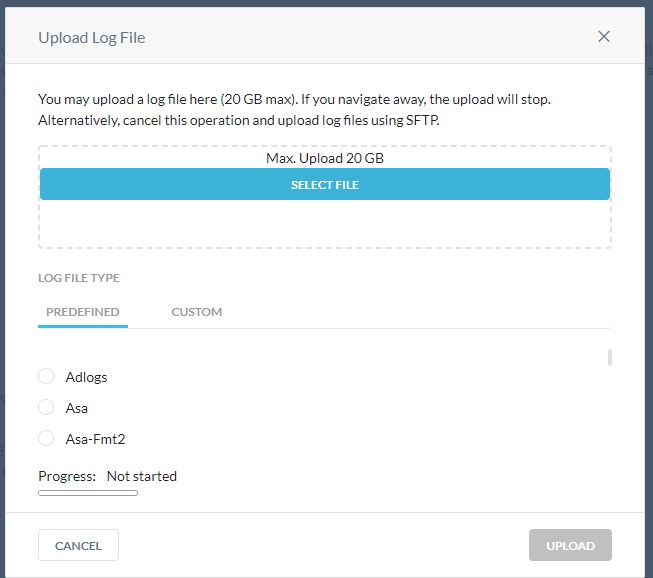
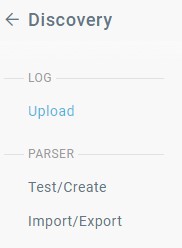
- Click Upload.

- Click Upload Logs.

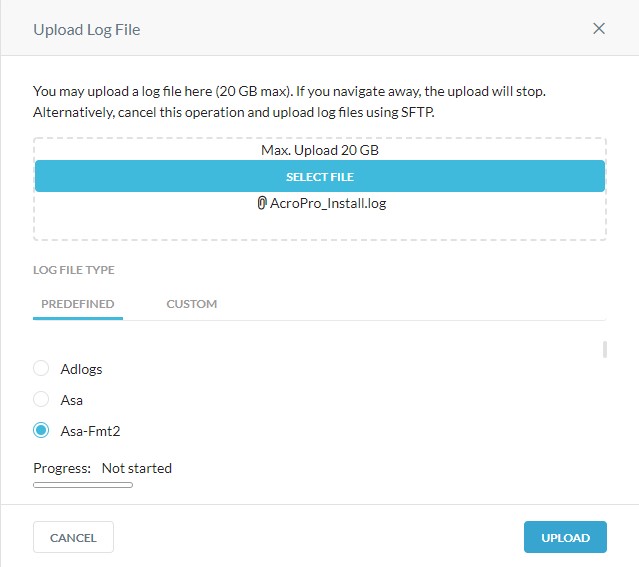
- Click Select File.
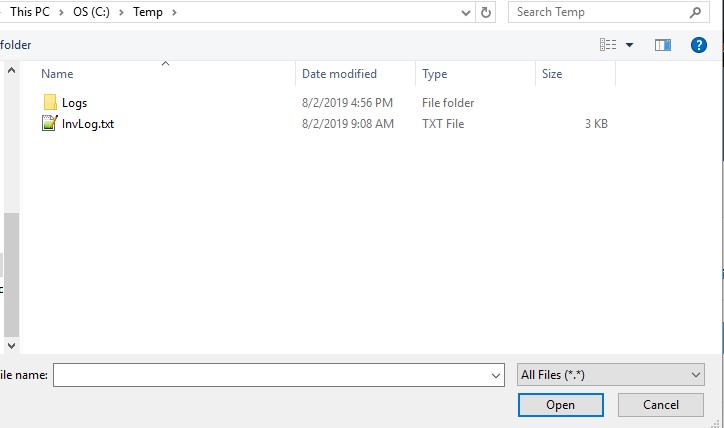
- Use Windows Explorer to go to the log file downloaded in Step 1. Select the file and then click Open.
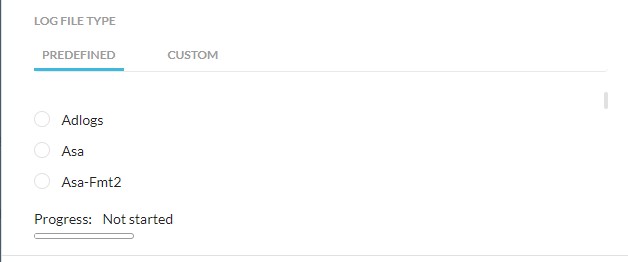
- Using the Predefined list, locate the vendor for the log type you selected in the previous step.
Note: For example, if using Cisco IronPort, you would use the
cisco-wsa directory. If using Blue Coat logs, you would use the proxysg-http-main directory. For more information, reference Supported Log Formats.
- Click Upload to upload the log for analysis.
Note: After the logs are uploaded, it takes some time to parse the logs and show events in SkopeIT. The upload times vary based on log file sizes.
To upload the logs from Windows using SFTP:
To successfully upload the logs over SFTP, Netskope requires a third-party SSH file transfer protocol (SFTP) client.
- Examples of an SFTP client include (but are not limited to):
- PuTTY
- WinSCP
- Filezilla
Note:
- Dell does not endorse nor support any listed third-party product. The listed clients are meant to be an example of potential products a customer can use. Contact the product’s manufacturer for information about setup, configuration, and management.
- Your SFTP Client UI may differ from the below screenshot examples.
- First, download log files from your supported vendor’s application.
Note: If using an archive (such as .zip), you can only have one log file per archive, and it may not be binary.
- If you have previously imported the SSH private key into your SFTP client, go to Step 10. Otherwise, go to Step 3.
- In a web browser, go to the Netskope web console:
- United States Datacenter: https://[TENANT].goskope.com/
- European Union Datacenter: https://[TENANT].eu.goskope.com/
- Frankfurt Datacenter: https://[TENANT].de.goskope.com/
Note: [TENANT] = The tenant name in your environment
- Log in to the Netskope web console.

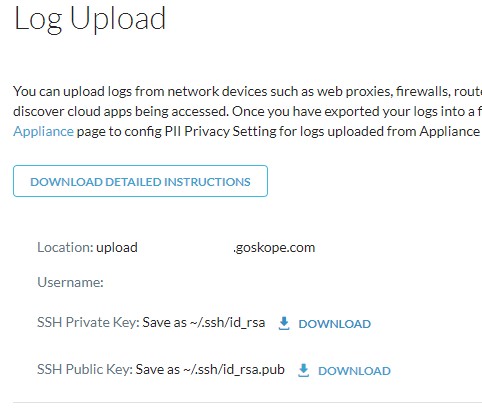
- Click Settings.

- Click Risk Insights.
- Click Upload.
- Click to Download the SSH Private Key.

- Open the SFTP client and import the SSH private key.
Note: If you are using WinSCP for SFTP, do not preserve the time for the log file.
- In the SFTP client, login with the Username and Location that is provided from the Log Upload page (Step 8).
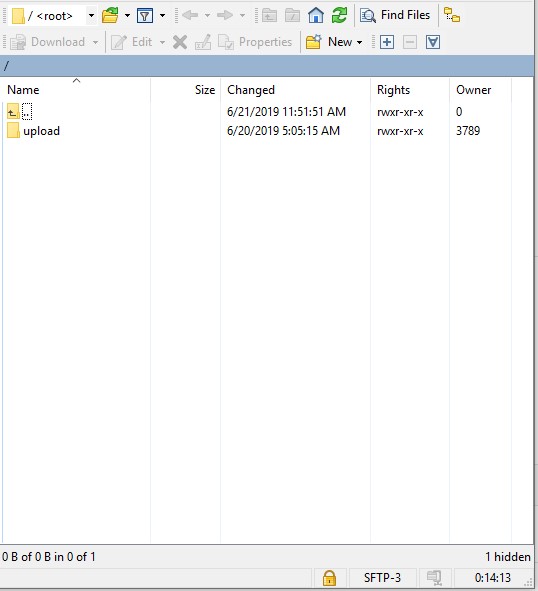
- Go to
/upload/.
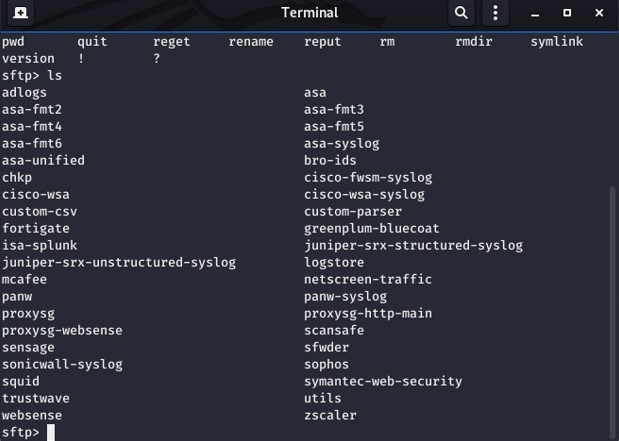
- Go to the directory for the device that is used for generating the log file (Step 1).
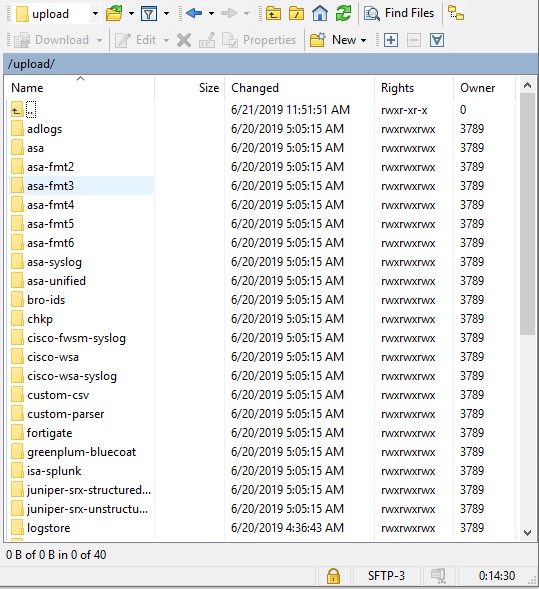
Note:
- The directory may differ from the example image.
- For example, if using Cisco IronPort, you would use the
cisco-wsadirectory (cd cisco-wsa). If using Blue Coat logs, you would use theproxysg-http-maindirectory (cd proxysg-http-main). Reference Supported Log Formats for more information.
- Upload the log files.
Note: After the logs are uploaded, it takes some time to parse the logs and show events in SkopeIT. The upload times vary based on log file sizes.
To upload the logs from Mac or Linux using SFTP:
To successfully upload the logs over SFTP, Netskope requires a third-party SSH file transfer protocol (SFTP) client.
- Examples of an SFTP client include (but are not limited to):
- PuTTY
- WinSCP
- Filezilla
Note:
- Dell does not endorse nor support any listed third-party product. The listed clients are meant to be an example of potential products a customer can use. Contact the product’s manufacturer for information about setup, configuration, and management.
- Your SFTP Client UI may differ from the below screenshot examples.
- First, download log files from your supported vendor’s application.
Note: If using an archive (such as .zip), you can only have one log file per archive, and it may not be binary.
- In a web browser, go to the Netskope web console:
- United States Datacenter: https://[TENANT].goskope.com/
- European Union Datacenter: https://[TENANT].eu.goskope.com/
- Frankfurt Datacenter: https://[TENANT].de.goskope.com/
Note: [TENANT] = The tenant name in your environment
- Log in to the Netskope web console.
- Click Settings.
- Click Risk Insights.

- Click Upload.

- Click to Download the SSH Private Key.
Note:
- You may change permissions of the private key file to restrict access. If permissions of the downloaded private key file must be changed, open Terminal, type
chmod 600 [ENVIRONMENTVARIABLE]_sshkey.keyand then press Enter. [ENVIRONMENTVARIABLE]= A unique identifier in your environment
- Open Terminal.
- Using the Location and Username that is provided from the Log Upload page, type
sftp -i /privatekey/[ENVIRONMENTVARIABLE]_sshkey.key [USERNAME]@upload-[TENANT].goskope.comand then press Enter.

Note:
[ENVIRONMENTVARIABLE]= A unique identifier in your environment[USERNAME]= The Log Upload page username (Step 7)[TENANT]= The tenant name in your environment
- Type
cd uploadand then press Enter.
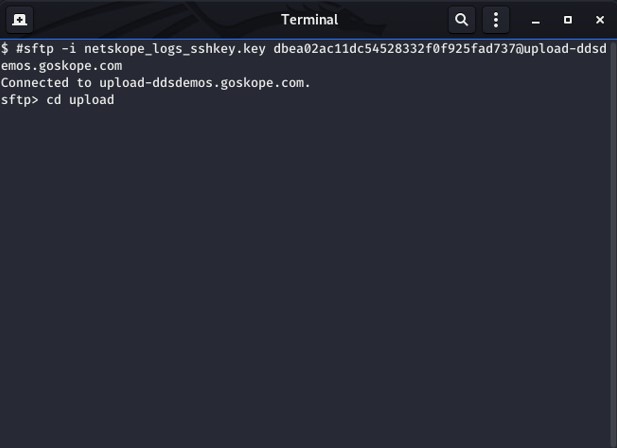
- Go to the directory for the device that is used for generating the log file in Step 1.
Note:
- The directory may differ from the example image.
- For example, if using Cisco IronPort, you would use the
cisco-wsadirectory (cd cisco-wsa). If using Blue Coat logs, you would use theproxysg-http-maindirectory (cd proxysg-http-main). Reference Supported Log Formats for more information.
- Type
mput [SOURCEPATH] [FILENAME]and then press Enter to upload the log files.

Note:
[SOURCEPATH]= Path to the log to upload.[FILENAME]= Filename of the log being uploaded.- After the logs are uploaded, it takes some time to parse the logs and show events in SkopeIT. The upload times vary based on log file sizes.
Netskope supports the following log formats:
| Device | Log Format |
|---|---|
| Cisco-ASA | asa, asa-syslog |
| Bro-IDS | bro-ids |
| Checkpoint | chkp |
| Cisco Catalyst | cisco-fwsm-syslog |
| Cisco IronPort | cisco-wsa, cisco-wsa-syslog |
| Fortinet | fortigate |
| Bluecoat logs sent to Greenplum logserver | greenplum-bluecoat |
| Microsoft-ISA | isa-splunk |
| Juniper SRX | juniper-srx-structured-syslog |
| Juniper SRX | juniper-srx-unstructured-syslog |
| Juniper Netscreen | netscreen-traffic |
| McAfee Web GW | mcafee |
| Palo Alto Networks | panw, panw-syslog |
| Bluecoat logs exported in websense format | proxysg-websense |
| Cisco ScanSafe | scansafe |
| Sensage SIEM | sensage |
| Sonicwall | sonicwall-syslog |
| Squid Proxy | squid |
| Sophos Web Gateway | sophos |
| Symantec Web Security | Symantec-web-security |
| Trustwave | trustwave |
| Websense | websense |
| Zscaler | zscaler |
To contact support, reference Dell Data Security International Support Phone Numbers.
Go to TechDirect to generate a technical support request online.
For additional insights and resources, join the Dell Security Community Forum.
Additional Information
Videos
Article Properties
Affected Product
Netskope
Last Published Date
19 Dec 2022
Version
8
Article Type
How To