Dell Data Wipe
Summary: This article provides information about the Dell Data Wipe feature on Dell BIOS and instructions on use of this feature.
This article applies to
This article does not apply to
This article is not tied to any specific product.
Not all product versions are identified in this article.
Instructions
Dell Data Wipe is a feature in Dell Enterprise Client BIOS that gives our customers the ability to invoke a data wipe of the internal storage devices in their computers. This allows efficient erasure for repurpose or redeployment using industry-standard data wipe capabilities already supported by Dell storage devices.
Since customer data is a priority for Dell we designed this feature for maximum compatibility, and minimal potential for unintentional data erase.
- Dell Data Wipe supports internal storage devices only: SATA hard drive, SSD, and eMMC depending on the device types supported by the system.
- Dell Data Wipe use industry standard approved methods for data wipe such as Secure Erase for SATA and Sanitize for eMMC.
- Dell Data Wipe is only accessible by a physically present user. The user must be physically present until the drive wipe begins.
- Dell Data Wipe wipes all internal drives in the computer, no option to wipe only certain storage devices.
Note: Dell Data Wipe is supported on most of the Dell products. To know if your computer is supported, go to the BIOS setup and select Security, then see if the Data Wipe in Next Boot option is available. For Alienware users, select Advanced, then Maintenance to find the Data Wipe in Next Boot option.
- The Data Wipe feature is invoked from within BIOS Setup. At the Dell splash screen, press F2 to enter BIOS Setup.
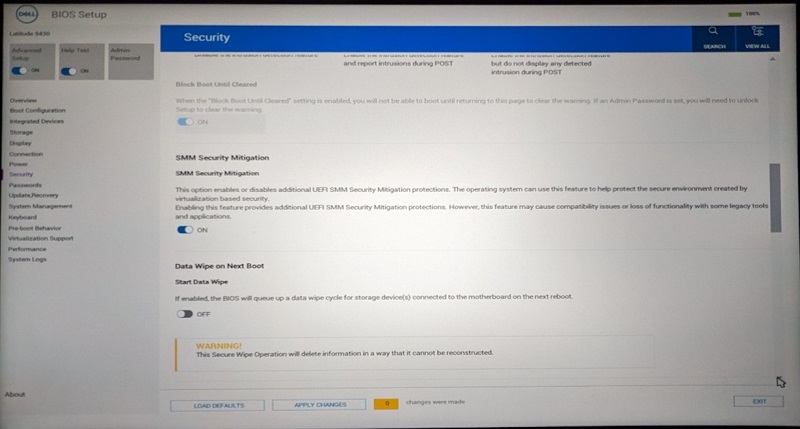
- Once in the BIOS Setup application, the user can select "Wipe on Next Boot" from the Security > Data Wipe option or Advanced > Maintenance to invoke data wipe for all internal drives after the reboot. The BIOS asks for user confirmation twice before allowing the user to exit setup with the "Wipe on Next Boot" option selected to ensure that the user intends to erase all storage devices.
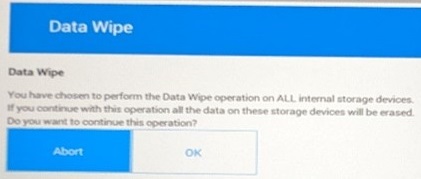
- As an added safety measure, the BIOS adjusts the default selection for the final prompt to further enforce direct user acceptance of this operation.

- Once the option is successfully selected and the prompts have been confirmed, the user exits BIOS Setup to force a reboot of the system and begin the data wipe process. After the reboot, the BIOS once again prompts for several confirmations before sending the data wipe instructions to the customer storage devices.
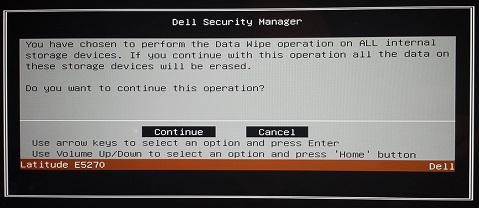
- The user can select to cancel the drive wipe procedure at either of these prompts, and the data wipe trigger is reset. The process must be reinitiated from BIOS Setup to restart the erasing procedure, if wanted.
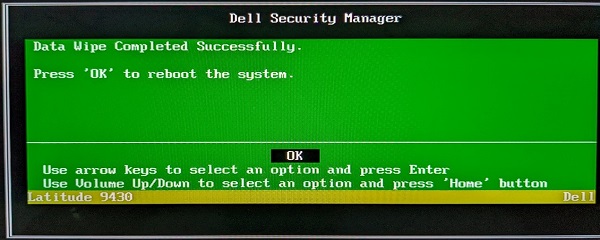
- A successful erase procedure is reported by a green dialog and the "Data Wipe Completed Successfully" message. If there are any failures, they are presented instead of the success dialog: "Reboot the system and reinstall the OS".
Additional Information
Additional information about erasing your data can be found on the Dell Knowledge Base article How Do I Erase Data from My Hard Drive?.
Affected Products
Alienware, Inspiron, OptiPlex, Vostro, XPS, Alienware, Inspiron, Latitude, Vostro, XPS, Fixed Workstations, Mobile WorkstationsArticle Properties
Article Number: 000146892
Article Type: How To
Last Modified: 08 Oct 2024
Version: 9
Find answers to your questions from other Dell users
Support Services
Check if your device is covered by Support Services.