Dell Encryption Personal에서 암호화 키를 수동으로 백업하는 방법
Zusammenfassung: Dell Encryption Personal 및 Dell Data Protection Personal Edition용 암호화 키는 다음 지침에 따라 수동으로 백업할 수 있습니다.
Dieser Artikel gilt für
Dieser Artikel gilt nicht für
Dieser Artikel ist nicht an ein bestimmtes Produkt gebunden.
In diesem Artikel werden nicht alle Produktversionen aufgeführt.
Symptome
이 문서에서는 Dell Encryption Personal(이전 Dell Data Protection | Personal Edition)에서 암호화 키를 수동으로 백업하는 방법(키 에스크로라고도 함)에 대한 정보를 제공합니다.
영향을 받는 제품:
- Dell Encryption Personal
- Dell Data Protection | Personal Edition
영향을 받는 운영 체제:
- Windows
Ursache
해당 사항 없음
Lösung
암호화 키를 백업하는 특정 단계를 보려면 해당하는 클라이언트 버전을 클릭합니다. 버전 지정에 대한 자세한 내용은 Dell Encryption Enterprise 또는 Dell Encryption Personal 버전을 식별하는 방법을 참조하십시오.
참고:
- 키를 성공적으로 백업하려면 Dell Encryption Personal에 스토리지 디바이스가 필요합니다(Dell Encryption Personal이 설치된 엔드포인트 외부).
- 키를 백업하려면 암호화 관리자 비밀번호가 필요합니다.
- Windows 컴퓨터에 로그인합니다.
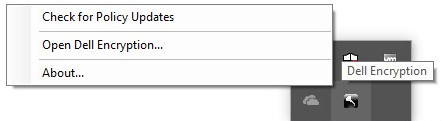
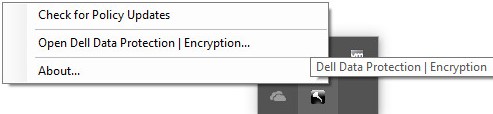
- Windows 시스템 트레이에서 Dell Encryption 아이콘을 마우스 오른쪽 버튼으로 클릭한 후 Open Dell Encryption을 선택합니다.
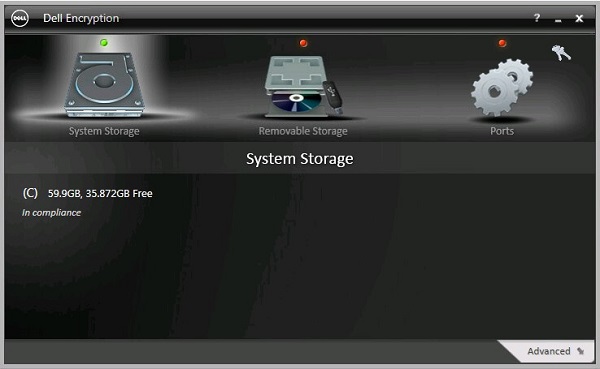
- 오른쪽 상단에 있는 키 아이콘을 클릭합니다.
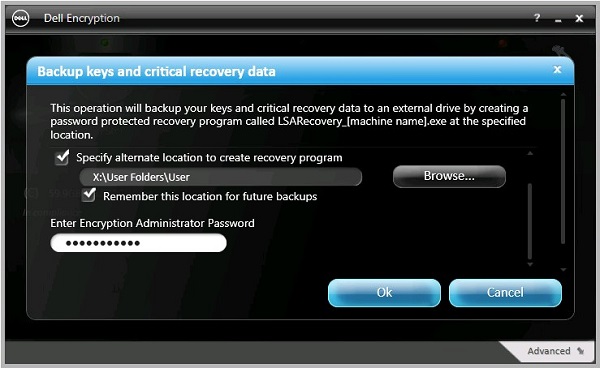
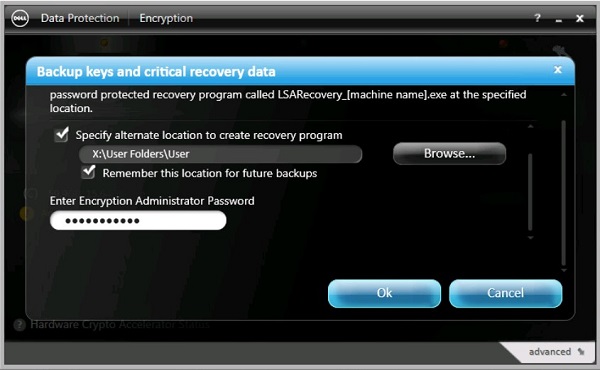
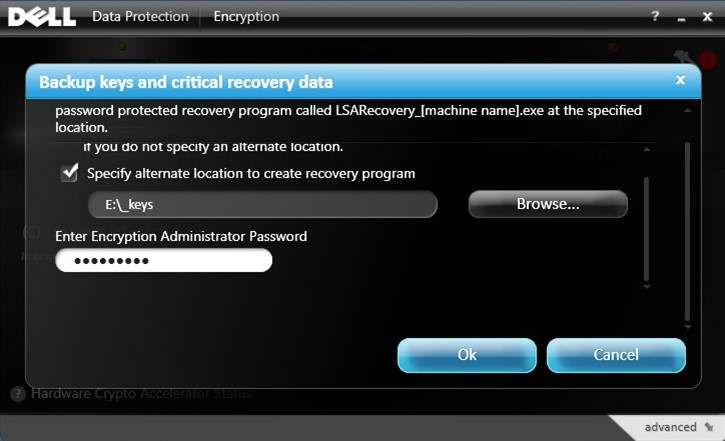
- 백업 키 및 중요 복구 데이터 메뉴에서 다음을 수행합니다.
- Specify alternate location to create recovery program 확인란을 선택합니다.
- 보조 스토리지 디바이스를 찾아보려면 Browse를 클릭합니다.
- 필요한 경우 Remember this location for future backups 확인란을 선택합니다.
- Encryption Administrator Password를 입력합니다.
- 확인을 클릭합니다.
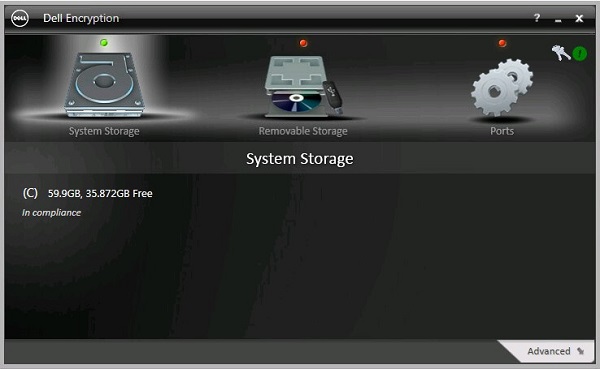
- 백업 완료 시 키 아이콘(2단계) 옆에 녹색 ! 아이콘이 표시됩니다.
- 선택한 위치에
LSARecovery_[NAME]이 나타납니다(4단계).

참고:
[NAME] = 엔드포인트 이름
- Windows 컴퓨터에 로그인합니다.
- Windows 시스템 트레이에서 Dell Data Protection | Encryption 아이콘을 오른쪽 클릭한 다음 Open Dell Data Protection | Encryption을 선택합니다.

- 오른쪽 상단에 있는 키 아이콘을 클릭합니다.

- 백업 키 및 중요 복구 데이터 메뉴에서 다음을 수행합니다.
- Specify alternate location to create recovery program 확인란을 선택합니다.
- 보조 스토리지 디바이스를 찾아보려면 Browse를 클릭합니다.
- 필요한 경우 Remember this location for future backups 확인란을 선택합니다.
- Encryption Administrator Password를 입력합니다.
- 확인을 클릭합니다.
- 백업 완료 시 키 아이콘(2단계) 옆에 녹색 ! 아이콘이 표시됩니다.
- 선택한 위치에
LSARecovery_[NAME]이 나타납니다(4단계).

참고:
[NAME] = 엔드포인트 이름
- Windows 컴퓨터에 로그인합니다.
- Windows 시스템 트레이에서 Dell Data Protection | Encryption 아이콘을 오른쪽 클릭한 다음 Open Dell Data Protection | Encryption을 선택합니다.
- 오른쪽 상단에 있는 키 아이콘을 클릭합니다.

- 백업 키 및 중요 복구 데이터 메뉴에서 다음을 수행합니다.
- Specify alternate location to create recovery program 확인란을 선택합니다.
- 보조 스토리지 디바이스를 찾아보려면 Browse를 클릭합니다.
- Encryption Administrator Password를 입력합니다.
- 확인을 클릭합니다.
- 백업 완료 시 키 아이콘(2단계) 옆에 녹색 ! 아이콘이 표시됩니다.
- 선택한 위치에
LSARecovery_[NAME]이 나타납니다(4단계).

참고:
[NAME] = 엔드포인트 이름
지원 부서에 문의하려면 Dell Data Security 국제 지원 전화번호를 참조하십시오.
온라인으로 기술 지원 요청을 생성하려면 TechDirect로 이동하십시오.
추가 정보 및 리소스를 보려면 Dell 보안 커뮤니티 포럼에 참여하십시오.
Weitere Informationen
Videos
Betroffene Produkte
Dell EncryptionArtikeleigenschaften
Artikelnummer: 000126842
Artikeltyp: Solution
Zuletzt geändert: 24 Okt. 2023
Version: 9
Antworten auf Ihre Fragen erhalten Sie von anderen Dell NutzerInnen
Support Services
Prüfen Sie, ob Ihr Gerät durch Support Services abgedeckt ist.