如何在 Dell Encryption Personal 中手動備份加密金鑰
Zusammenfassung: Dell Encryption Personal 和 Dell Data Protection Personal Edition 的加密金鑰可依照以下指示手動備份。
Dieser Artikel gilt für
Dieser Artikel gilt nicht für
Dieser Artikel ist nicht an ein bestimmtes Produkt gebunden.
In diesem Artikel werden nicht alle Produktversionen aufgeführt.
Symptome
本文提供如何在 Dell Encryption Personal (先前稱為 Dell Data Protection | Personal Edition) 中手動備份加密金鑰 (又稱為委付金鑰) 的相關資訊。
受影響的產品:
- Dell Encryption Personal
- Dell Data Protection | Personal Edition
受影響的作業系統:
- Windows
Ursache
不適用
Lösung
按一下適當的用戶端版本以取得特定步驟,將加密金鑰備份。如需更多版本控制資訊,請參閱如何識別 Dell Encryption Enterprise 或 Dell Encryption Personal 版本。
注意:
- 若要成功備份金鑰,Dell Encryption Personal 需要儲存裝置 (已安裝 Dell Encryption Personal 的端點以外)。
- 備份金鑰時,必須使用加密系統管理員密碼。
- 登入 Windows 電腦。
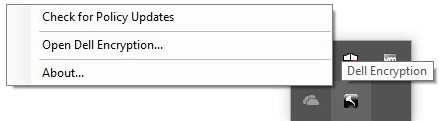
- 在 Windows 系統匣中,以滑鼠右鍵按一下 Dell Encryption 圖示,然後選取開啟 Dell Encryption。
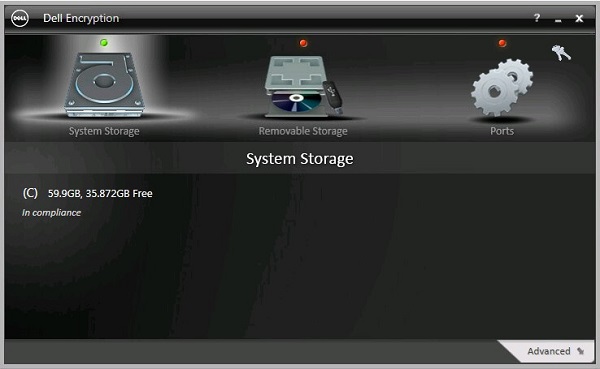
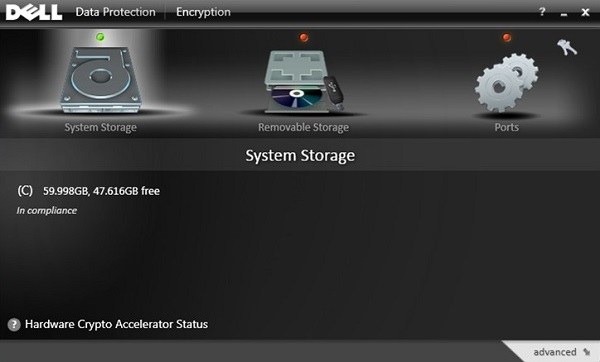
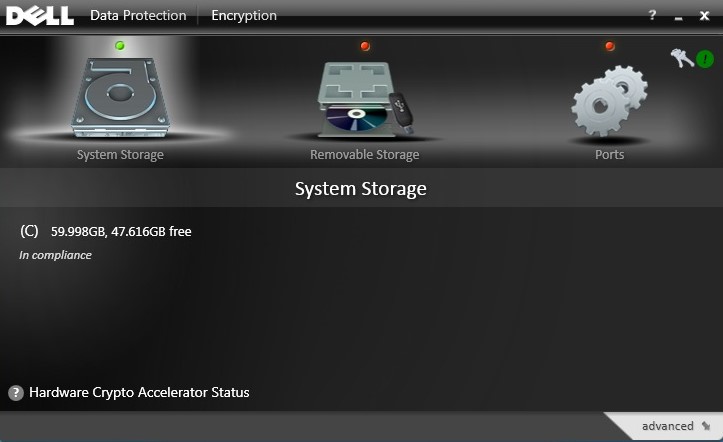
- 按一下右上方的金鑰圖示。
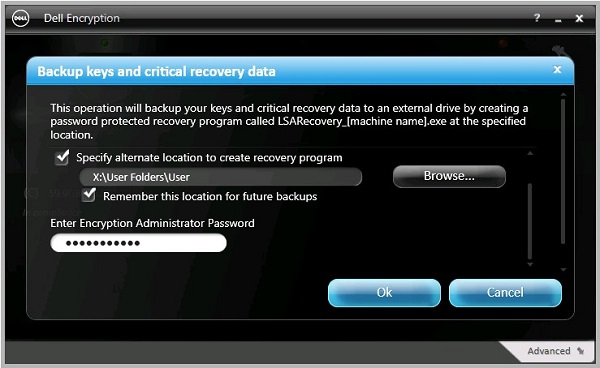
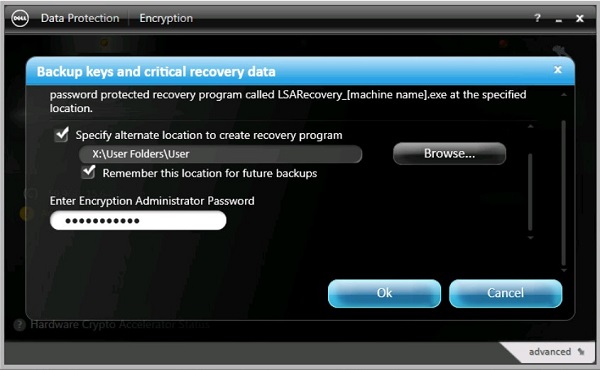
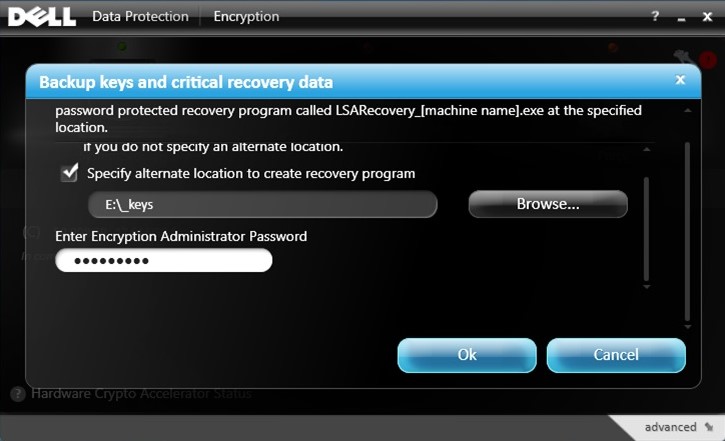
- 從備份金鑰和關鍵復原資料功能表:
- 勾選指定替代位置以建立復原程式。
- 按一下以瀏覽至次要儲存裝置。
- 或者,請勾選記住此位置以供日後備份。
- 填入加密系統管理員密碼。
- 按一下確定。
- 備份完成後,金鑰圖示 (步驟 2) 旁邊會顯示綠色 ! 圖示。
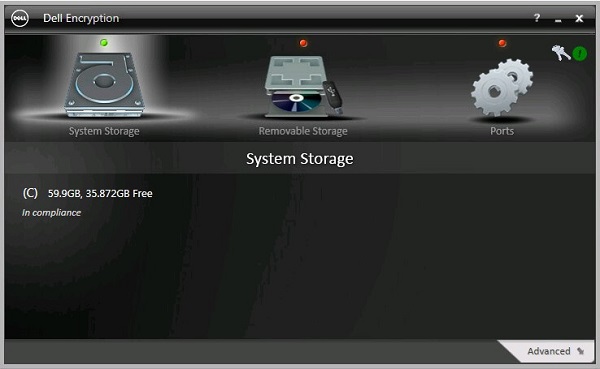
- 在選擇的位置中即會顯示
LSARecovery_[NAME](步驟 4)。

注意:
[NAME] = 端點名稱
- 登入 Windows 電腦。
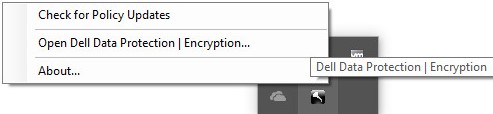
- 在 Windows 系統匣中,以滑鼠右鍵按一下 Dell Data Protection | Encryption 圖示,然後選取開啟 Dell Data Protection | Encryption。
- 按一下右上方的金鑰圖示。
- 從備份金鑰和關鍵復原資料功能表:
- 勾選指定替代位置以建立復原程式。
- 按一下以瀏覽至次要儲存裝置。
- 或者,請勾選記住此位置以供日後備份。
- 填入加密系統管理員密碼。
- 按一下確定。
- 備份完成後,金鑰圖示 (步驟 2) 旁邊會顯示綠色 ! 圖示。
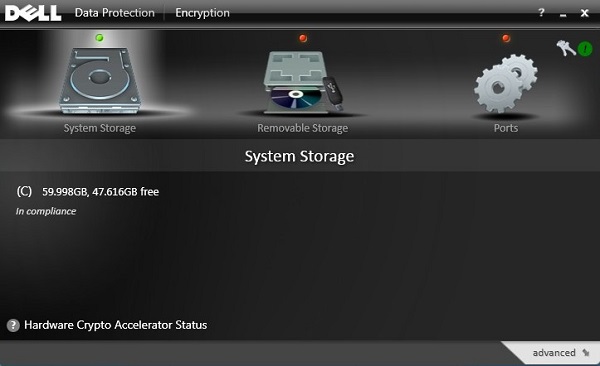
- 在選擇的位置中即會顯示
LSARecovery_[NAME](步驟 4)。

注意:
[NAME] = 端點名稱
- 登入 Windows 電腦。
- 在 Windows 系統匣中,以滑鼠右鍵按一下 Dell Data Protection | Encryption 圖示,然後選取開啟 Dell Data Protection | Encryption。

- 按一下右上方的金鑰圖示。

- 從備份金鑰和關鍵復原資料功能表:
- 勾選指定替代位置以建立復原程式。
- 按一下以瀏覽至次要儲存裝置。
- 填入加密系統管理員密碼。
- 按一下確定。
- 備份完成後,金鑰圖示 (步驟 2) 旁邊會顯示綠色 ! 圖示。
- 在選擇的位置中即會顯示
LSARecovery_[NAME](步驟 4)。

注意:
[NAME] = 端點名稱
如要聯絡支援部門,請參閱 Dell Data Security 國際支援電話號碼。
請前往 TechDirect,以線上產生技術支援要求。
如需更多深入見解與資源,請加入 Dell 安全性社群論壇。
Weitere Informationen
Videos
Betroffene Produkte
Dell EncryptionArtikeleigenschaften
Artikelnummer: 000126842
Artikeltyp: Solution
Zuletzt geändert: 24 Okt. 2023
Version: 9
Antworten auf Ihre Fragen erhalten Sie von anderen Dell NutzerInnen
Support Services
Prüfen Sie, ob Ihr Gerät durch Support Services abgedeckt ist.