如何收集 Dell Security Management Server Virtual 的記錄
Zusammenfassung: 您可以依照以下指示收集 Dell Security Management Server Virtual 或 Dell Data Protection Virtual Edition 的記錄。
Dieser Artikel gilt für
Dieser Artikel gilt nicht für
Dieser Artikel ist nicht an ein bestimmtes Produkt gebunden.
In diesem Artikel werden nicht alle Produktversionen aufgeführt.
Symptome
本文涵蓋如何收集 Dell Security Management Server Virtual (先前稱為 Dell Data Protection | Virtual Edition) 的記錄。
受影響的產品:
- Dell Security Management Server Virtual
- Dell Data Protection | Virtual Edition
受影響的作業系統:
- Linux
Ursache
不適用
Lösung
Dell Security Management Server Virtual 的記錄收集程序會因版本而異。如需詳細資訊,請針對 v9.11.0 及 更新版本或 8.2.0 至 9.10.1 選取適當的指示。如需版本資訊,請參閱如何識別 Dell Data Security/Dell Data Protection 伺服器版本。
v9.11.0 及更新版本
Dell Security Management Server Virtual 需要系統管理員在收集之前執行擷取記錄。如需詳細資訊,請選取適當的動作。
若要擷取記錄:
- 使用預設系統管理員 (
delluser) 登入資料登入 Dell Security Management Server Virtual 管理主控台。

注意:
- Dell Data Protection Enterprise Server Virtual Edition 的預設登入資料為:
- 使用者名稱:
delluser - 密碼:
delluser
- 使用者名稱:
- 系統管理員可以變更在產品的虛擬裝置選單中的預設密碼。
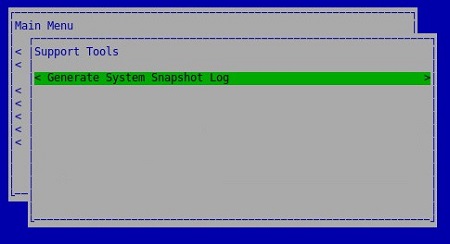
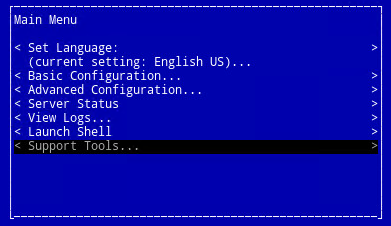
- 在主功能表上,選取支援工具,然後按下 Enter 鍵。
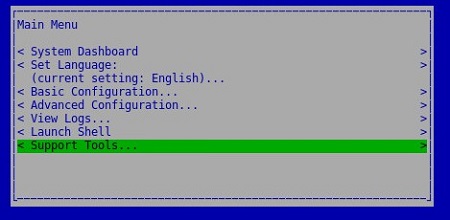
注意:
- 滑鼠無法在 Linux 虛擬裝置中運作。使用方向鍵瀏覽裝置。
- 虛擬裝置會限制滑鼠和鍵盤對外部視窗的存取。若要釋放滑鼠和鍵盤鎖定,請按下 CTRL + ALT。
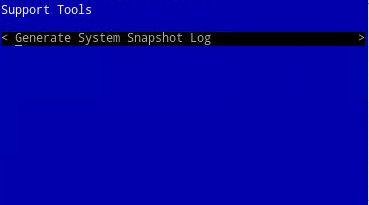
- 選取產生系統快照記錄,然後按下 Enter 鍵。
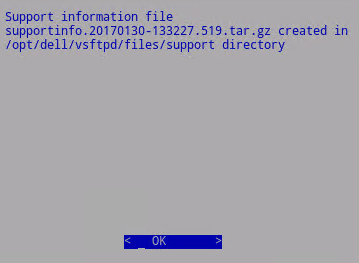
- 成功收集記錄時,選取確定,然後按下 Enter 鍵。
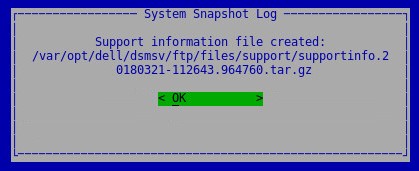
注意:記下檔案名 (根據時間戳記)。
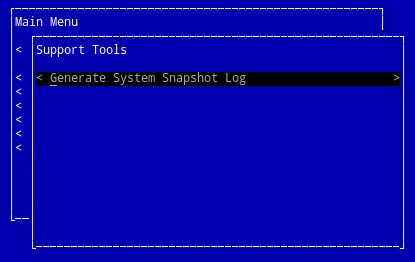
- 按下 ESC 鍵以返回主功能表。

若要收集記錄:
若要成功卸載記錄,Dell Security Management Server Virtual 需要:
- 第三方 FTP (檔案傳輸通訊協定) 用戶端
- FTP 用戶端的範例包括但不限於:
- Filezilla
- WinSCP
- CuteFTP
- FTP 用戶端的範例包括但不限於:
- 儲存裝置 (位於 Dell Security Management Server Virtual 之外)
- 在 FTP 用戶端中,使用 FTP 使用者登入 Dell Security Management Server Virtual

注意:
- 必須在 Dell Security Management Server 內建立 FTP 使用者。請參閱如何在 Dell Security Management Server Virtual/Dell Data Protection Virtual Edition 內建立 FTP 使用者,以獲得更多資訊。
- 針對列出的第三方產品,Dell 不會為其背書,亦不提供支援。列出以上用戶端的目的為提供客戶可使用的潛在產品範例。請聯絡產品製造商,以取得有關設定、組態及管理的相關資訊。
- 您的 FTP 用戶端 UI 可能與螢幕擷取畫面範例有所不同。
- SFTP 的預設連接埠號碼為 22。如果連線失敗,請確定防火牆沒有封鎖連接埠 22。
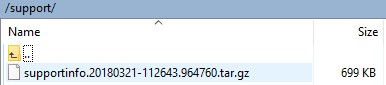
- 前往擷取的記錄 (
/var/opt/dell/dsmsv/ftp/files/support),並在本機儲存套裝。

注意:.tar 記錄套裝需要要讀取的檔案封存程式 (例如 WinZip、WinRAR、7-Zip)。
v8.2.0 至 9.10.1
Dell Security Management Server Virtual 需要系統管理員在收集之前執行擷取記錄。如需詳細資訊,請選取適當的動作。
若要擷取記錄:
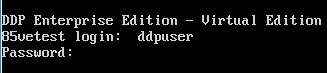
- 使用預設系統管理員 (
ddpuser) 登入資料登入 Dell Enterprise Server Virtual 管理主控台。
注意:
- Dell Data Protection Enterprise Server Virtual Edition 的預設登入資料為:
- 使用者名稱:
ddpuser - 密碼:
ddpuser
- 使用者名稱:
- 系統管理員可以變更在產品的虛擬裝置選單中的預設密碼。
- 在主功能表上,選取支援工具,然後按下 Enter 鍵。
注意:
- 滑鼠無法在 Linux 虛擬裝置中運作。使用方向鍵瀏覽裝置。
- 虛擬裝置會限制滑鼠和鍵盤對外部視窗的存取。若要釋放滑鼠和鍵盤鎖定,請按下 CTRL + ALT。
- 選取產生系統快照記錄,然後按下 Enter 鍵。
- 成功收集記錄時,選取確定,然後按下 Enter 鍵。
注意:記下檔案名 (根據時間戳記)。
- 按下 ESC
若要收集記錄:
若要成功卸載記錄,Dell Security Management Server Virtual 需要:
- 第三方 FTP (檔案傳輸通訊協定) 用戶端
- FTP 用戶端的範例包括但不限於:
- Filezilla
- WinSCP
- CuteFTP
- FTP 用戶端的範例包括但不限於:
- 儲存裝置 (位於 Dell Security Management Server Virtual 之外)
- 在 FTP 用戶端中,使用 FTP 使用者登入 Dell Security Management Server Virtual

注意:
- 必須在 Dell Security Management Server 內建立 FTP 使用者。請參閱如何在 Dell Security Management Server Virtual/Dell Data Protection Virtual Edition 內建立 FTP 使用者,以獲得更多資訊。
- 針對列出的第三方產品,Dell 不會為其背書,亦不提供支援。列出以上用戶端的目的為提供客戶可使用的潛在產品範例。請聯絡產品製造商,以取得有關設定、組態及管理的相關資訊。
- 您的 FTP 用戶端 UI 可能與螢幕擷取畫面範例有所不同。
- SFTP 的預設連接埠號碼為 22。如果連線失敗,請確定防火牆沒有封鎖連接埠 22。
- 前往擷取的記錄 (
/opt/dell/vsftpd/files/support),並在本機儲存套裝。
注意:.tar 記錄套裝需要要讀取的檔案封存程式 (例如 WinZip、WinRAR、7-Zip)。
如要聯絡支援部門,請參閱 Dell Data Security 國際支援電話號碼。
請前往 TechDirect,以線上產生技術支援要求。
如需更多深入見解與資源,請加入 Dell 安全性社群論壇。
Weitere Informationen
Videos
Betroffene Produkte
Dell EncryptionArtikeleigenschaften
Artikelnummer: 000126740
Artikeltyp: Solution
Zuletzt geändert: 11 Apr. 2023
Version: 15
Antworten auf Ihre Fragen erhalten Sie von anderen Dell NutzerInnen
Support Services
Prüfen Sie, ob Ihr Gerät durch Support Services abgedeckt ist.