TPM Firmware Downgrade to TPM Version 1.2 Fails with Error "Update FAILED: Invalid source version"
Summary: If you encounter this error message when flashing the TPM 1.2 firmware on certain Kaby Lake systems, you may need to change or downgrade your firmware.
Symptoms
You may receive the following error "Update FAILED: Invalid source version" when flashing the TPM 1.2 firmware on Kaby Lake systems. This article provides additional information on this issue and the steps to take for a resolution.
TPM Firmware Downgrade to TPM Version 1.2 error
The error message "Update FAILED: Invalid source version" may occur when flashing the TPM 1.2 firmware on Kaby Lake systems (see Figure 1). This error is caused by flashing the incorrect TPM 1.2 firmware version. Version 5.81.0.0 for Nuvaton TPMS was the version that existed prior to Dell shipping most Kaby Lake systems. When Kaby Lake started shipping we released Nuvaton TPM FW 5.81.2.1 as an update from 5.81.0.0. All systems should be proactively updated to Version 5.81.2.1 if they are using a Nuvaton TPM in 1.2 mode regardless of year created or processor.
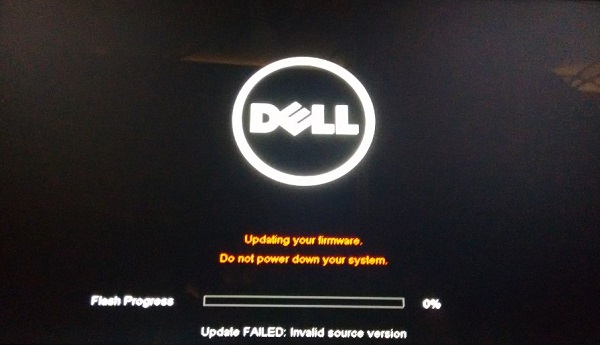
Figure 1: TPM Firmware Downgrade Error
If you are having difficulties flashing the TPM from version 5.81.0.0 to 5.81.2.1, try instead updating TPM 2.0 Firmware Update version 1.3.2.8_V1 listed below.
Current TPM firmware versions provided by Dell as of February 2018:
- Dell TPM 2.0 Firmware Update Utility (32 bit installer), Nuvoton TPM, version 1.3.2.8_V1
- Dell TPM 2.0 Firmware Update Utility (64 bit installer), Nuvoton TPM, version 1.3.2.8_V1
- Dell TPM 1.2 Firmware Update Utility (32 bit installer), Nuvoton TPM, version 5.81.2.1_V3
- Dell TPM 1.2 Firmware Update Utility (64 bit installer) , Nuvoton TPM, version 5.81.2.1_V3
You can also verify which firmware flashes the system supports by checking the driver page of that platform (not the Service Tag specifically) on the Dell's Support Website.
 NOTE: Windows 7 is still not supported on Kaby Lake system models, so this applies only to systems running Windows 10 in Legacy mode.
How to downgrade the TPM firmware from 2.0 to 1.2
For the Kaby Lake systems, follow the steps below to downgrade the TPM firmware from 2.0 to 1.2:
 NOTE: The error may also occur on systems with the Windows 7 32-bit operating system and the Intel Skylake processor installed. If you see the error on this configuration when downgrading to TPM 1.2, select the Clear setting in the BIOS under the Security / TPM 2.0 Security settings, then disable the SHA-256 setting. After clearing TPM, reboot the computer and perform the TPM downgrade through the BIOS flash update utility from the F12 boot selection menu.
- Disable BitLocker first from the Manage BitLocker pane if currently enabled:
- Click Start, type manage bitlocker and hit Enter (Figure 2):
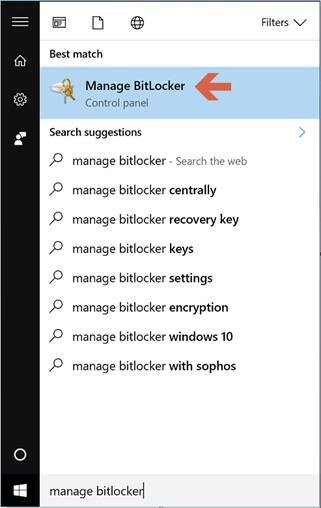
Figure 2: Open Manage BitLocker Control Panel - From the BitLocker Drive Encryption Control Panel pane, select Turn off BitLocker (Figure 3):
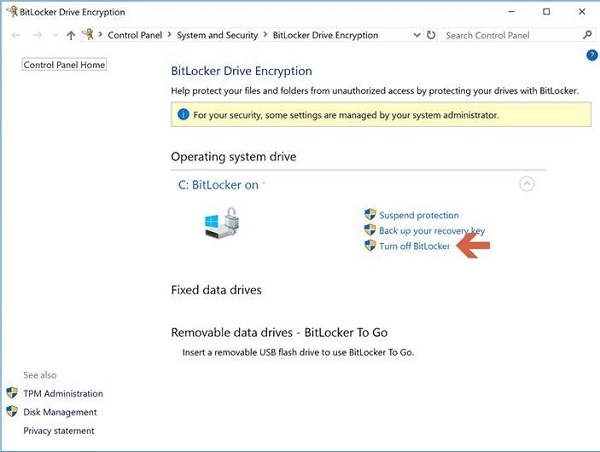
Figure 3: BitLocker Drive Encryption Control Panel - Click Turn off BitLocker to confirm (Figure 4):
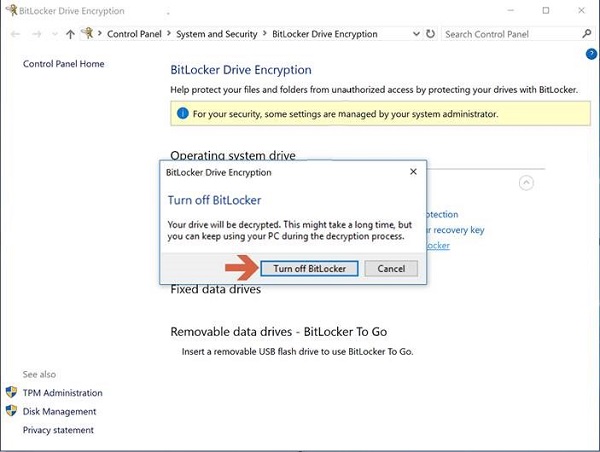
Figure 4: Turn off BitLocker confirmation prompt - Proceed with Step 2 after decryption is complete.
- Click Start, type manage bitlocker and hit Enter (Figure 2):
- Click Start and type powershell in the search box.
- Right-click PowerShell (x86) and select Run as admin.
- Type the following PowerShell command Disable-TpmAutoProvisioning and hit Enter.
- Confirm the result AutoProvisioning : Disabled (Figure 5):
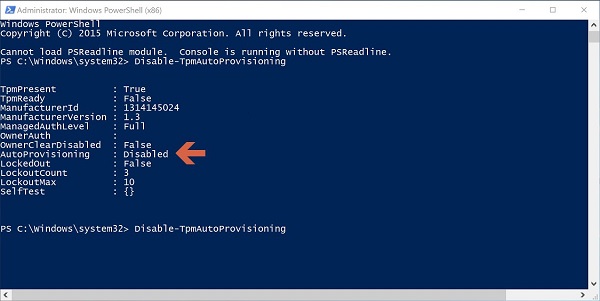
Figure 5: AutoProvisioning : Disabled PowerShell setting - Click Start and type tpm.msc in the search box, then hit Enter.
- In the right-side Actions pane, select Clear TPM…
- Reboot and hit F12 to proceed with clearing when prompted.
- Download and Run the TPM 1.2 firmware utility (Version 5.81.2.1_V3)from the following location: Dell TPM 1.2 Update Utility (Version 5.81.2.1_V3). Or you can follow the steps below to manually search for and install the file:
- Go to the following site: Dell Support / Drivers & Downloads.
- If the link does not go to the specific Drivers & Downloads page for your computer, enter the service tag or search for your computer model.
- Select the Security category.
- The latest Dell TPM 1.2 Firmware Update Utility will show in the menu. Click the download link to install the update.
- Reboot when prompted to install the firmware.
 NOTE: Make sure the computer is connected to AC power.
- After the laptop completes the firmware upgrade and reboots, verify in the Device Manager>Security devices section (or in the BIOS>Security section) that it says TPM 1.2 Security.
- Turn on BitLocker.