Article Number: 000218598
RecoverPoint for Virtual Machines: How to perform a failover during a disaster
Summary: The purpose of the KB is to illustrate how to perform a failover when there is a disaster at the production site.
Article Content
Instructions
When the Production site is unavailable for whatever reason (power outage, network outage or any other disaster that makes production site unreachable/unavailable) it is possible to run a failover from the DR site plug-in server.
If a plug-in server was not installed initially on the DR site vCenter, it is possible to deploy a new one and register it following the instructions from the installation guide.
To perform the failover from the DR site the steps are the same as usual failover, you can see the admin guide for more detail on the General procedure.
Below Detailed steps with screenshot.
- Open the vCenter in the DR site and login as administrator (or an equivalent account).
- From vSphere, open the RecoverPoint for Virtual Machines Plugin.
- The RecoverPoint for Virtual Machines Dashboard shows warnings about unknown status of Splitter/RPA/Devices of the production sites and not remote communication with Production sites (the warnings are not specific of a site disaster, there could be other cause for such warning to appear).

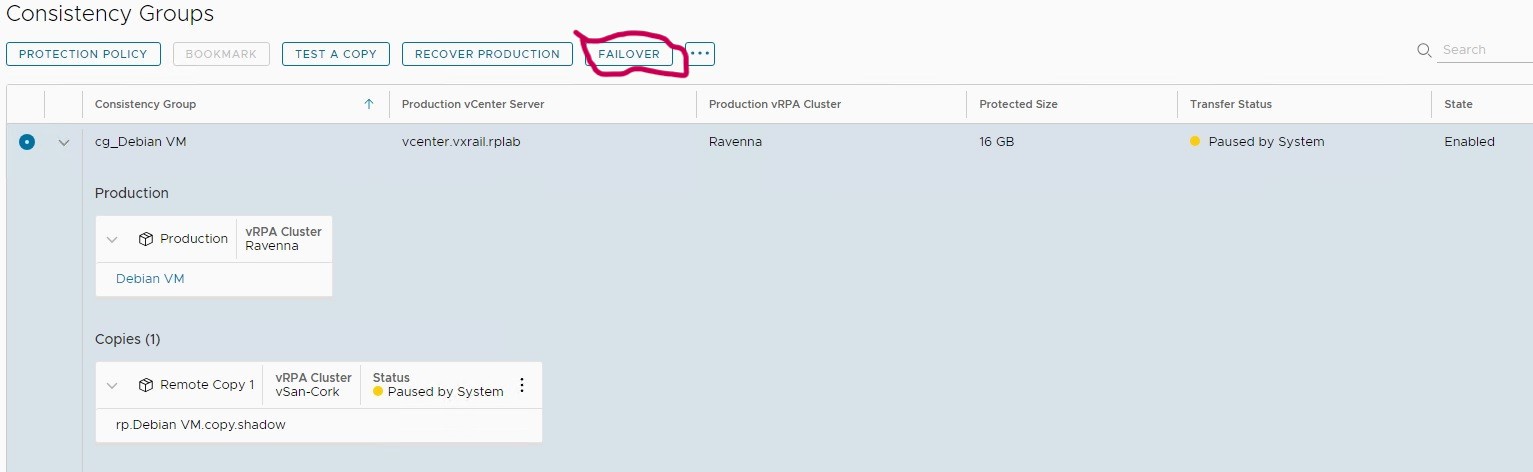
- The Protection - Consistency Group panel shows all group in Paused by system state. For each CG to failover select the group ad click the FAILOVER button at the top.
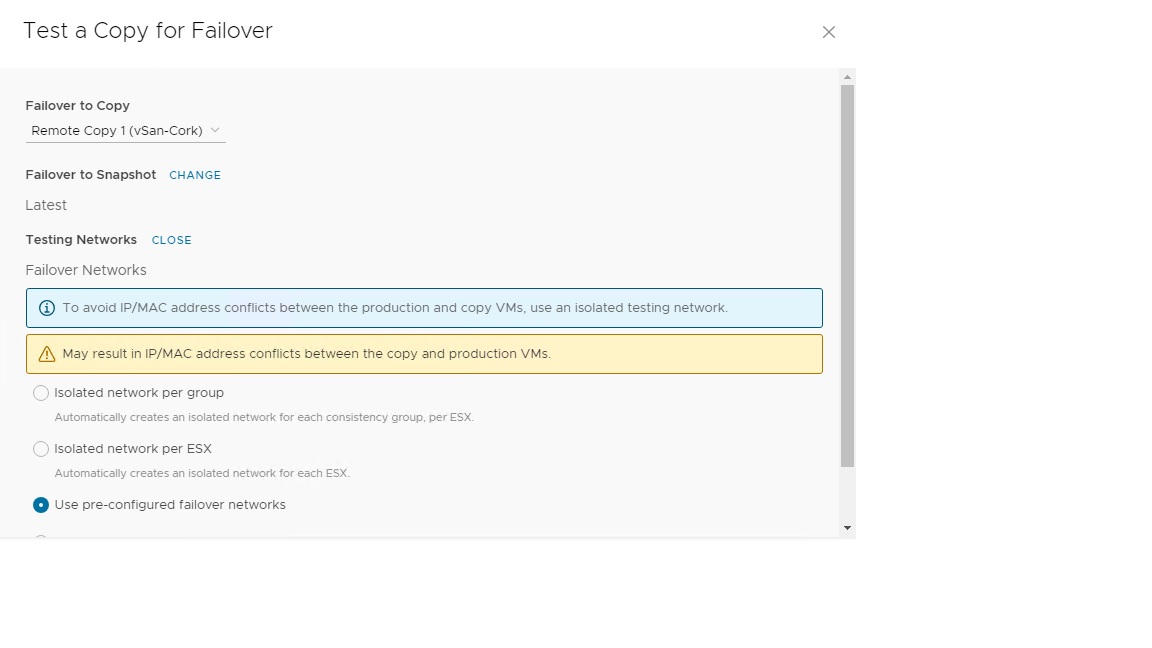
- Select the snapshot to be used and the network configuration to be applied (network and snapshot selection can be different from the example screenshot below depending on the environment).
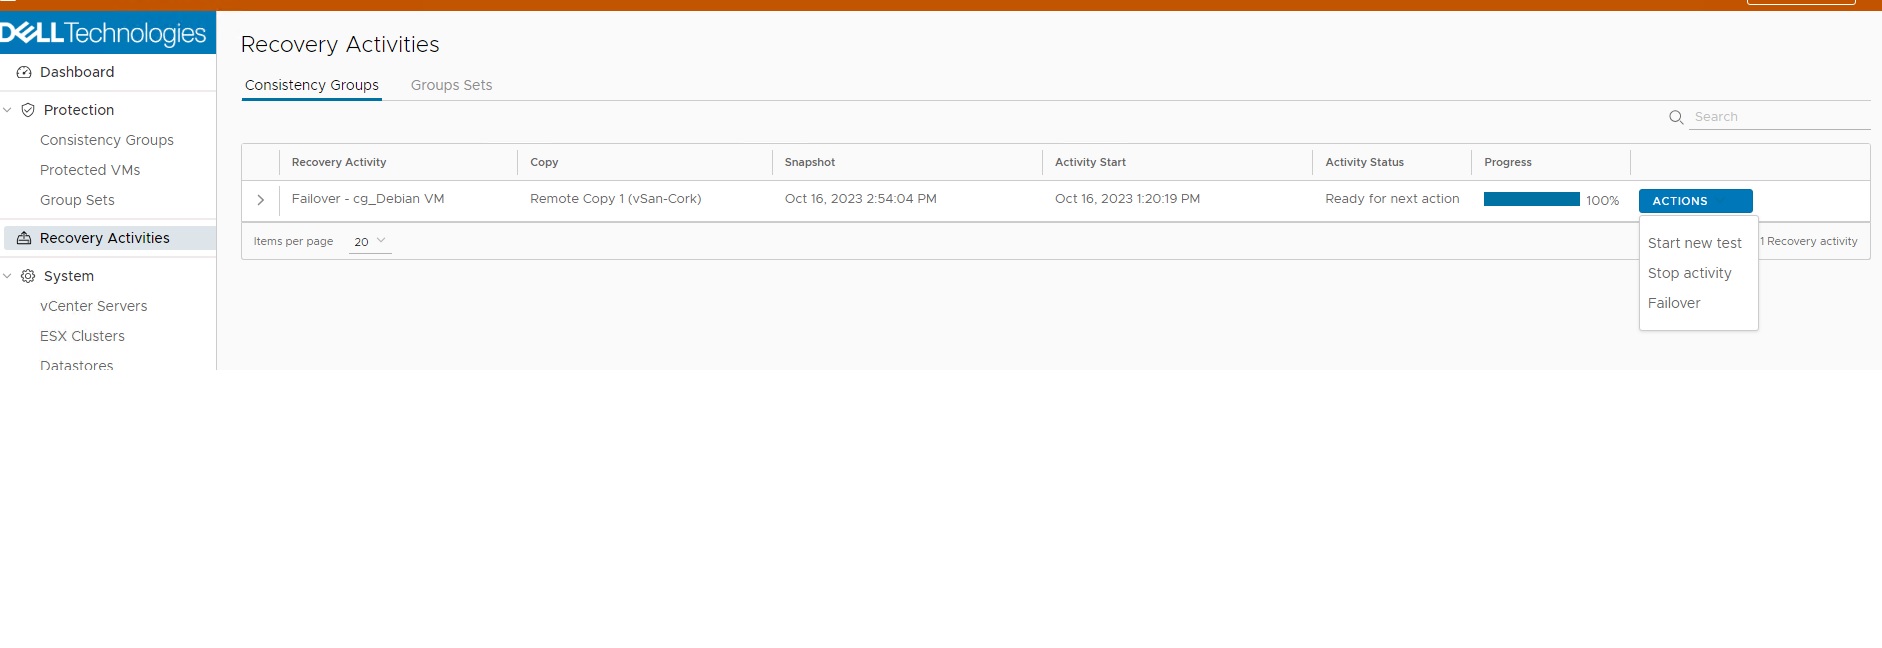
- From the RecoverPoint for Virtual Machines Plugin view, select Recovery Activities and wait for the progress bar to reach 100%(remember that at this stage you can decide if start replicating back immediately after the failover or not).

- When the Progress bar reached 100% you can test your data on the DR VM to ensure all data are valid (it is highly recommended to test the data before failing over, because once the failover is completed no more snapshot will be available), and once this i confirmed choose the failover option.
- The CG stays in paused by system state until the disaster is resolved.
- Once the disaster situation is resolved if this is the first time a failover is performed and for the original production copy the default value of Journal (3 GB) was selected then the following warning appear and the CG stays in paused by system state, in this case add Journal volume to the (now) DR copy to see the replication restart.
Replica copy XXX journal size is smaller than the required. Add Journal volumes to match a total of at least 10 GB
Once the copy became active if necessary, it is possible to fail back to the original production site.
Article Properties
Affected Product
RecoverPoint for Virtual Machines
Last Published Date
13 Nov 2023
Version
2
Article Type
How To