In my previous post, I shared my unboxing experience of a ‘fresh from the factory’ production unit of the Dell Precision Appliance for Wyse. In this post, I’ll share my experience of deploying the appliance.
Now that the Dell Precision Appliance for Wyse has been wired up, I powered on the unit and waited for the console to show us the IP address which was obtained automatically from the DHCP server in our lab environment.
 As you can see, the unit booted up into VMware ESXi 5.5 and I was able to obtain the IP address direction from the screen.
This completed all the actions in the Quick Start Guide. The last step was then to go to the Dell Support site to download the Quick Start Tool.
This tool will configure the appliance and bring up our three workstation VMs, including mapping the GPUs and host cards, assigning the CPU cores and memory, and all the other steps related to providing resources to the virtual machines. While I’ve never manually completed this process, I understand it takes experienced technicians several hours to perform these steps, requires significant knowledge of VMware, and can be error prone at best. With the hope that I could execute the Quick Start Tool, I set off to finish the installation.
Finding the tool on the Dell support site was quite easy, though the documentation could have been a little better. When I first landed on the indicated support page, it was not clear where the tool was located, however I saw that I could enter a Dell Service Tag number.
This brought me to a dedicated page for the Precision Rack Workstation, including links to manuals and downloads. After a few seconds, I quickly located the Quick Start Tool (I later realized that I could have just gone to http://www.dell.com/precisionappliancequickstart to download the tool) and downloaded it to a PC running in the lab.
The tool took a few seconds to download and install, which is one-time task. While the tool was downloading, I took a sneak peak at the QuickStart Tool walk-through video to know what to expect. The tool can be used with any number of appliances if you are installing multiple units.
While I was on the support site, I also took a few seconds to download the longer user manual, which is a PDF document that gives more in-depth instructions on some of the post-deployment tasks such as loading up a guest operating system on your new virtual workstation. However as my goal for this session was simply to deploy the appliance, I set that aside for another day.
With the Quick Start Tool installed and launched, it came up with a simple wizard-style interface and I simply started answering a few easy questions.
The first question was to enter the IP address of the appliance. Following that, I was asked to click a test button to verify that it could connect to the appliance. Success! This then led me to another screen where I was asked for my VMware keys and an optional NNTP server address. As these are all optional (the VMware system ships with a trial license), I simply bypassed this part.
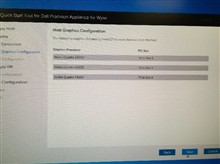
 The tool then ran a discovery on the appliance and found the three GPU cards, and it also verified the system configuration.
  As this was a factory unit, I did not have any error messages and thus was allowed to proceed. It then presented me with a screen to name my three virtual machines. I gave them some names and told it to finish up the installation.
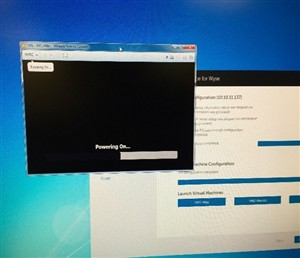
The tool then proceeded to configure my environment and rebooted the host, resulting in the completion screen shown below. From there, I was able to launch the console for each VM and power it on.
So that wraps it up. Very simple and straightforward. Receiving the products from the mailroom to getting them up and running took less than half an hour!
I now have three fully functional workstation-class virtual machines, ready for my client OS of choice (Windows 7, 8.1 or RHEL-all 64 Bit) and ready to run high-end, professional graphics applications in the time that most people take for their lunch break.
Stay tuned for future blog posts in which I continue my adventures with the Dell Precision Appliance for Wyse. If you haven’t already experienced the appliance, please reach out to your Dell account manager who can connect you with our Workstation Virtualization Center of Excellence where you can experience the appliance hands-on and run a proof of concept.


