The recent news of side-channel analysis vulnerabilities affecting many modern microprocessors has, as you can imagine, generated more than a few inquiries from our customers about updating their PowerEdge servers. If you’re in the same boat, asking yourself “What comes next? How do I apply these BIOS updates?”, then this post should help.
First things first, applying a BIOS update to a PowerEdge server is easy. Dell supplies different tools so you can choose the method best suited to your particular IT environment and needs.
Updating One or Two Servers?
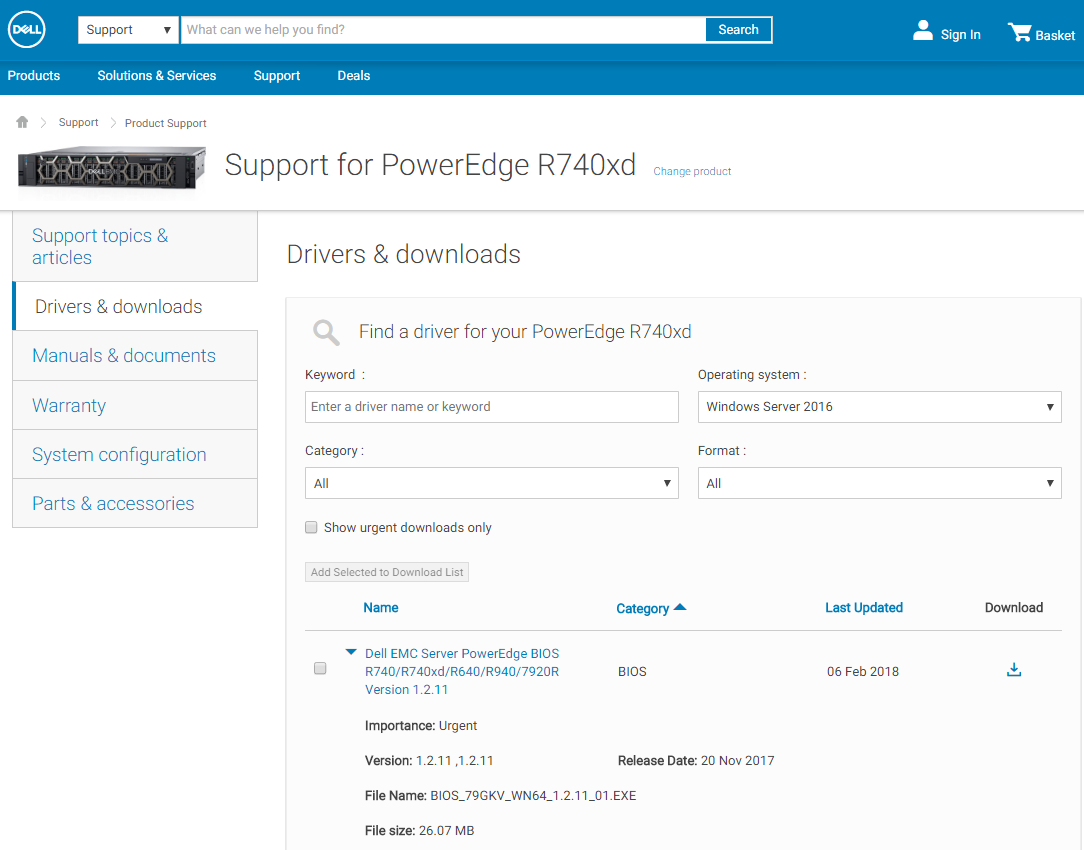
If you’re just updating one or two servers in a small shop, a BIOS update packages can be obtained from support.dell.com manually by keying in your server’s system tag and then looking for a BIOS update such as that shown in figure 1.

NOTE: Dell downloads and driver updates are free. That’s always been the case and there are no plans to change that.
Downloading this file and then applying it manually to a local server is straightforward, but if you have hundreds or more servers in a remote data center you’ll want to keep reading because we have better options for you.
Updating Lots of Servers, Even Automatically
Intelligent Automation is a Dell hallmark, and Dell offers a range of OpenManage solutions that can simplify mass server updates. With Dell Repository Manager, new updates from Dell online catalogs can be automatically downloaded, as shown in figure 2.

You can tell Repository Manager when to download updates, which servers you own, and what kind of updates you want. You can also command Repository Manager to download different sets of updates for different logical or physical groups of servers, and then to separate them into repositories in different locations. This gives you the flexibility to support different deployment methods.
So now you have a BIOS update. You’ve tested it and you want to deploy it to the production servers in your datacenter. Now what? Dell recommends one of the following approaches to automate updates:
- Use OpenManage Essentials or OpenManage Enterprise
- Use an OpenManage integration for either Microsoft System Center or VMware vCenter
- Create a custom automation script that operates with standard management APIs provided by the iDRAC with Lifecycle Controller embedded in every PowerEdge server.
As an example, OpenManage Enterprise, the next-generation Dell management console, provides a simple click-and-go process to schedule and perform BIOS updates for thousands of servers (see figure 3).

Those systems will process the update as scheduled and with no further intervention. If you’re new to managing PowerEdge servers, this is an easy way to efficiently update thousands of servers without a lot of effort.
If you already manage your IT environment with an existing management platform such as System Center or vSphere, our integrations and connections make short work of incorporating PowerEdge servers.
And you use scripts to perform IT operations, we offer resources on Dell TechCenter as well as open source PowerShell and Python Scripting repositories http://github.com/dell. These assets provide a good starting point for automation, and can be adapted to the specifics of your IT environment.
Dell Advantage: Dell provides the tools to deploy updates in a manner that best suits your needs. We realize that one method does not fit all situations.
Final Thoughts
Dell makes a variety of tools so you can perform server updates quickly and securely, particularly as part of an automated one-to-many update workflow. And because Dell provides easy-to-use tools that integrate well with each other and with third-party tools, they are readily adapted to a variety of IT environments.
If you want to download a slightly longer version of this post, you can find it online at http://dell.to/2CpiSEg. For detailed, technical information on performing updates on Dell PowerEdge servers, please visit this Dell TechCenter archive: http://dell.to/2o04cSn or for more on OpenManage systems management tools and technologies, please reference the Dell TechCenter wiki at http://dell.to/2w4myYE.